Stage I - Building the (mini) Honeynet
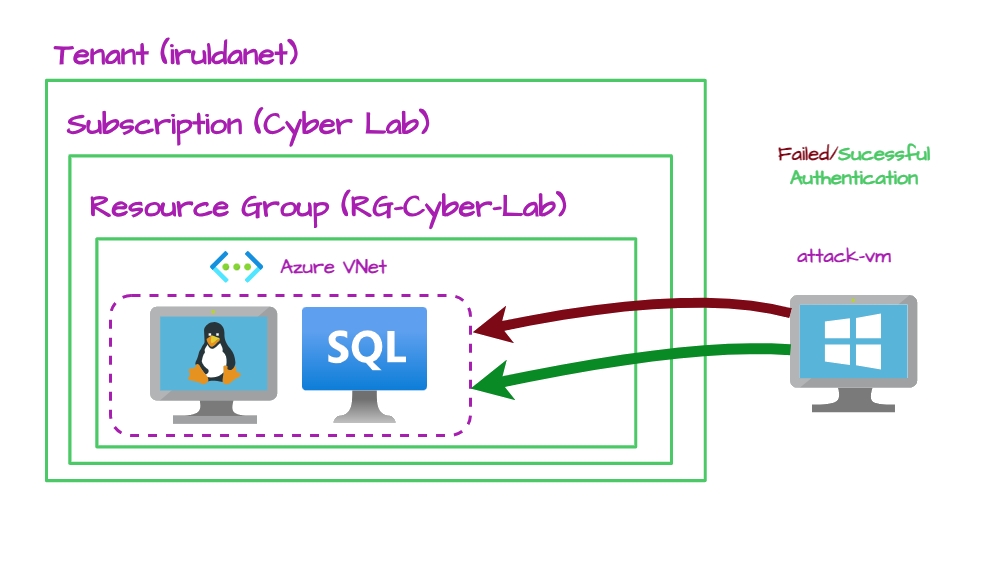
This project consists of two target virtual machines and one threat VM - two Windows VMs (one used for attack) and one Linux VM.
Creating Resources
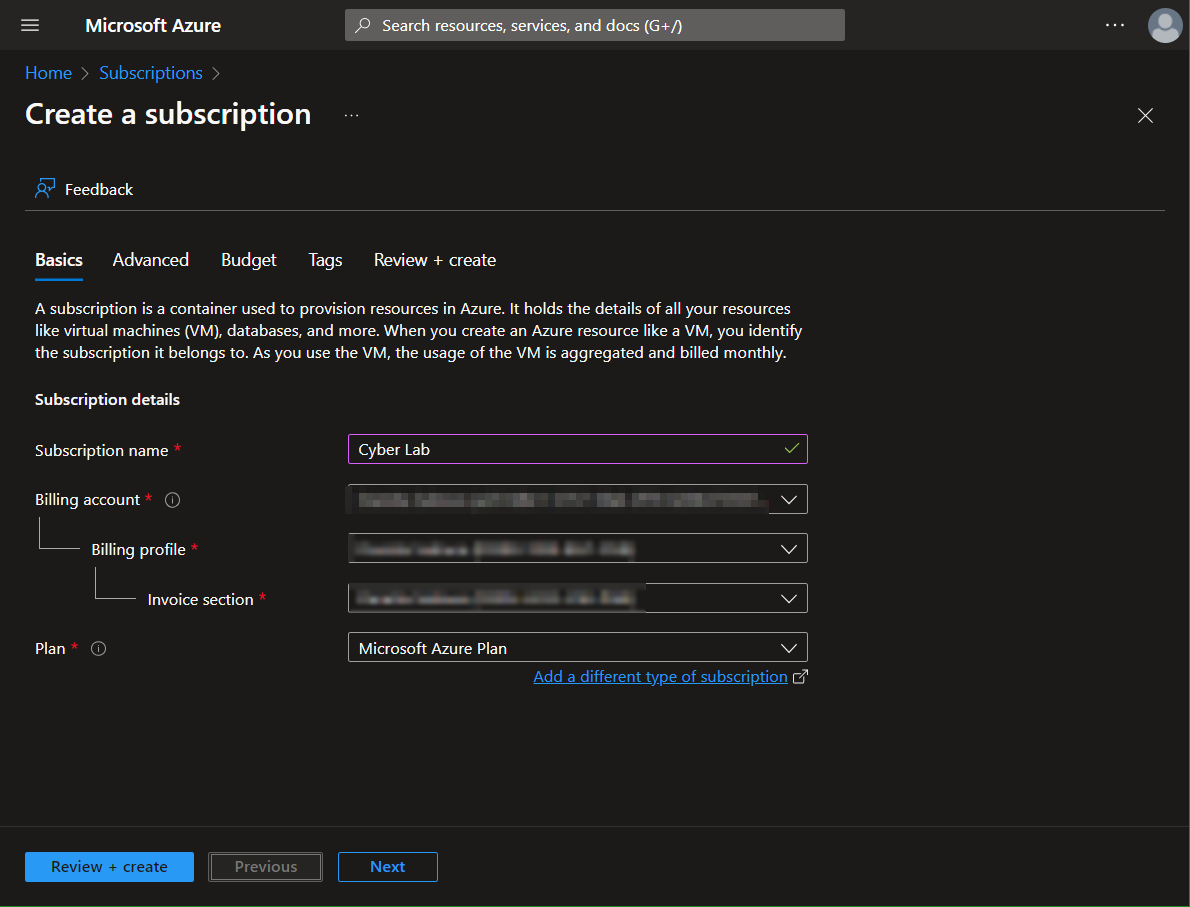
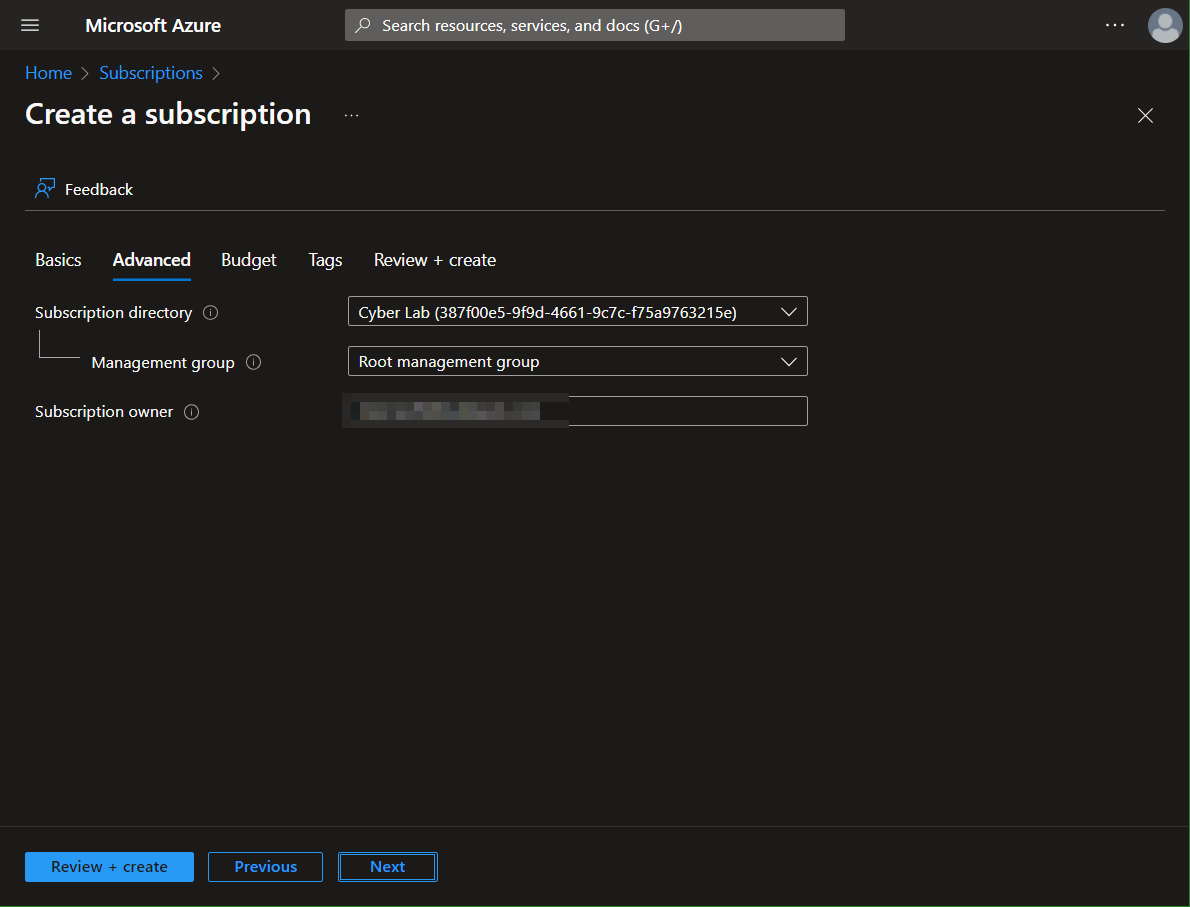
Create the Subscription
I already had an Azure account, a tenant (which I renamed + added a custom domain before this run) and a subscription from a previous run of the project. Here is an overview for the next few steps in this section:

For the sake of screenshots, I'm starting at creating the subscription. Don't forget to set a budget!
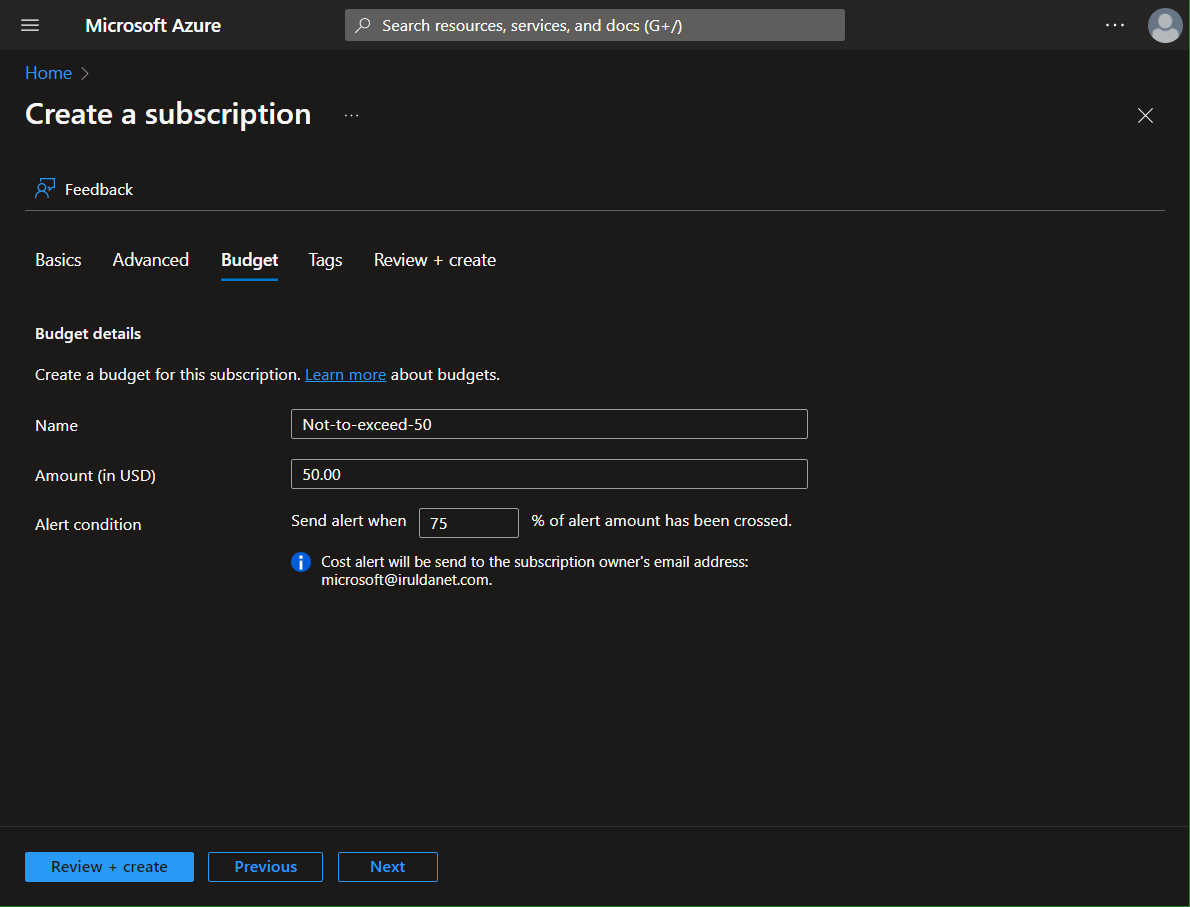
Later, I actually changed the alert threshold to something more reasonable like 90%.
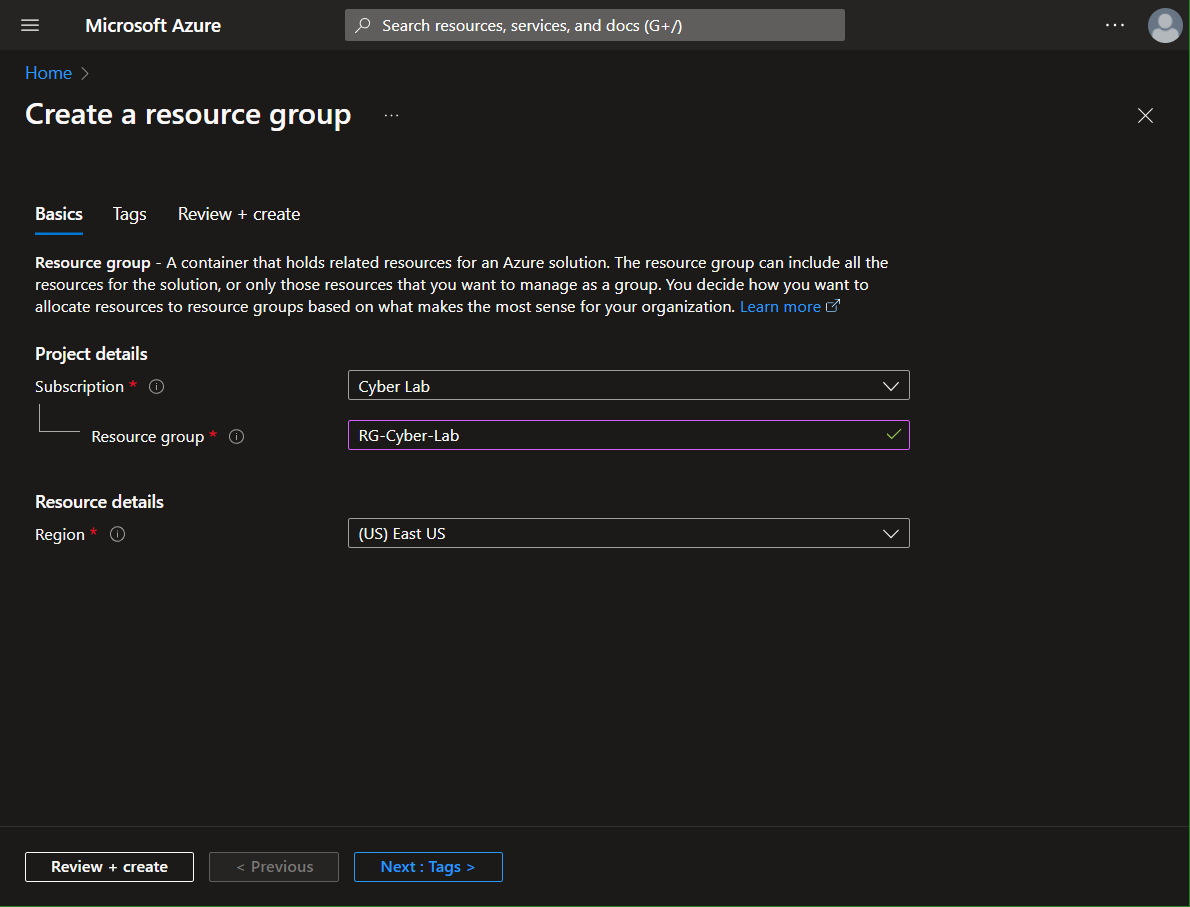
Create the first resource group
Next, create the first resource group (RG-Cyber-Lab). This one will house the resources that will be exposed to attack (the honeynet). Technically, this can be created at the same time that you create your VMs.
Create Virtual Machines
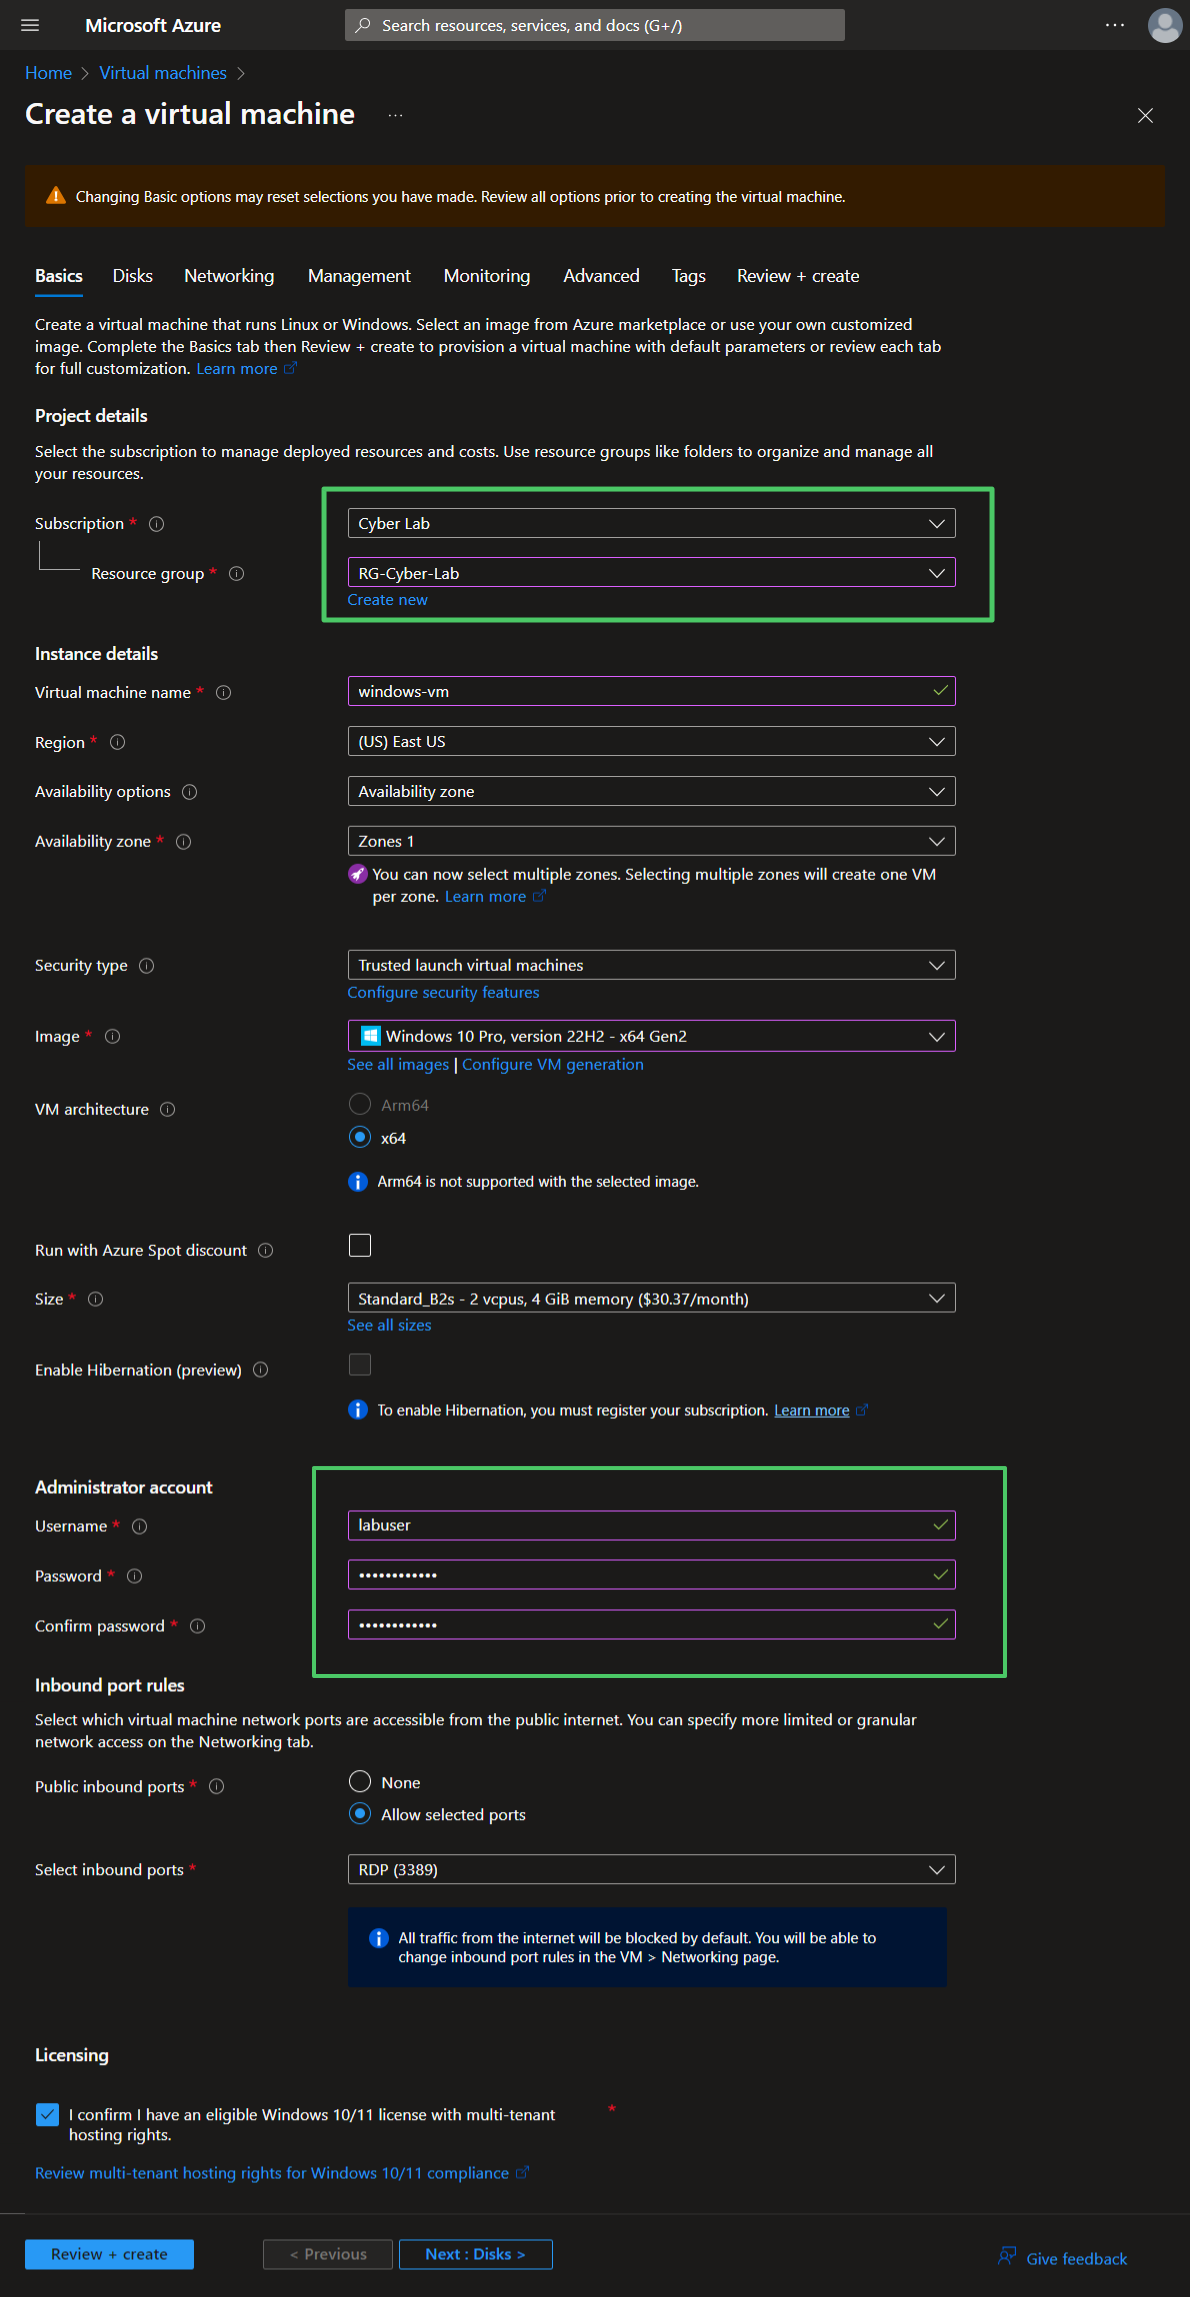
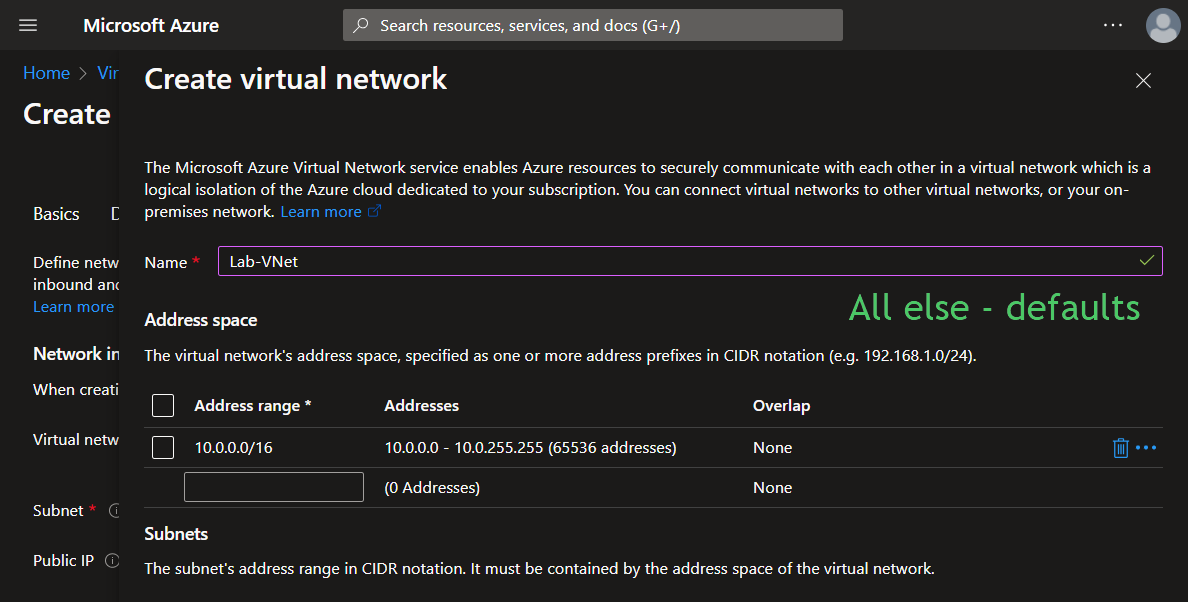
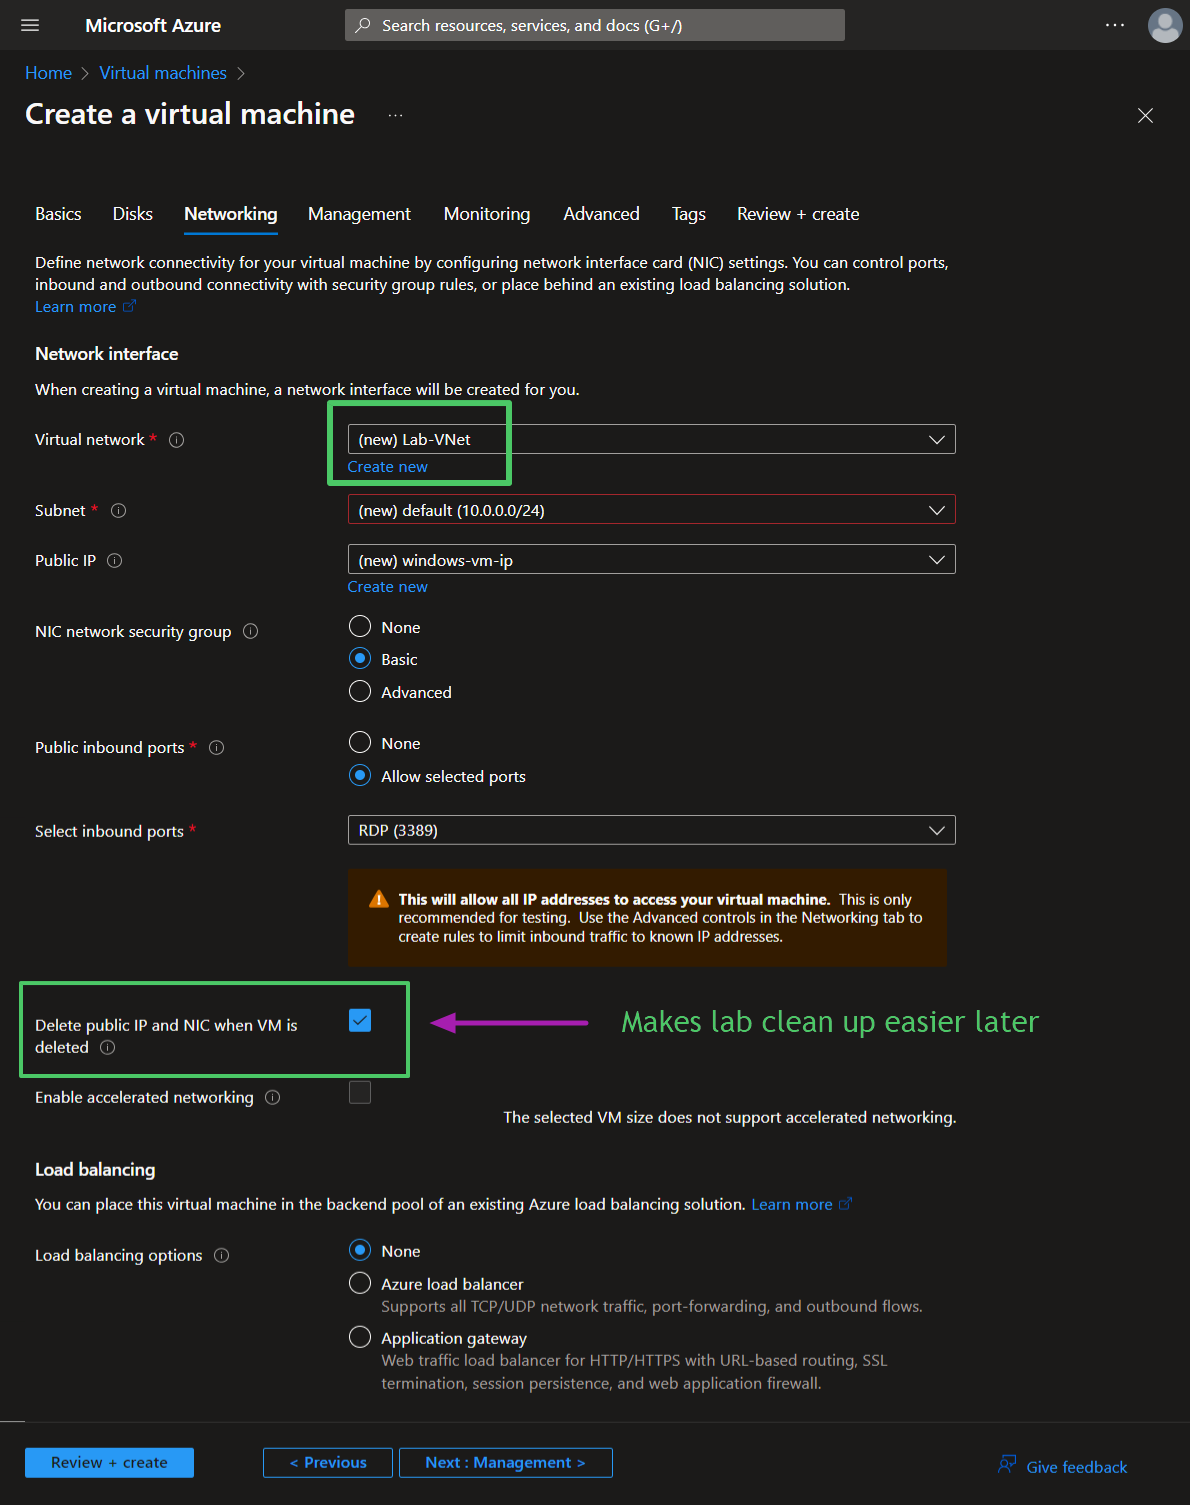
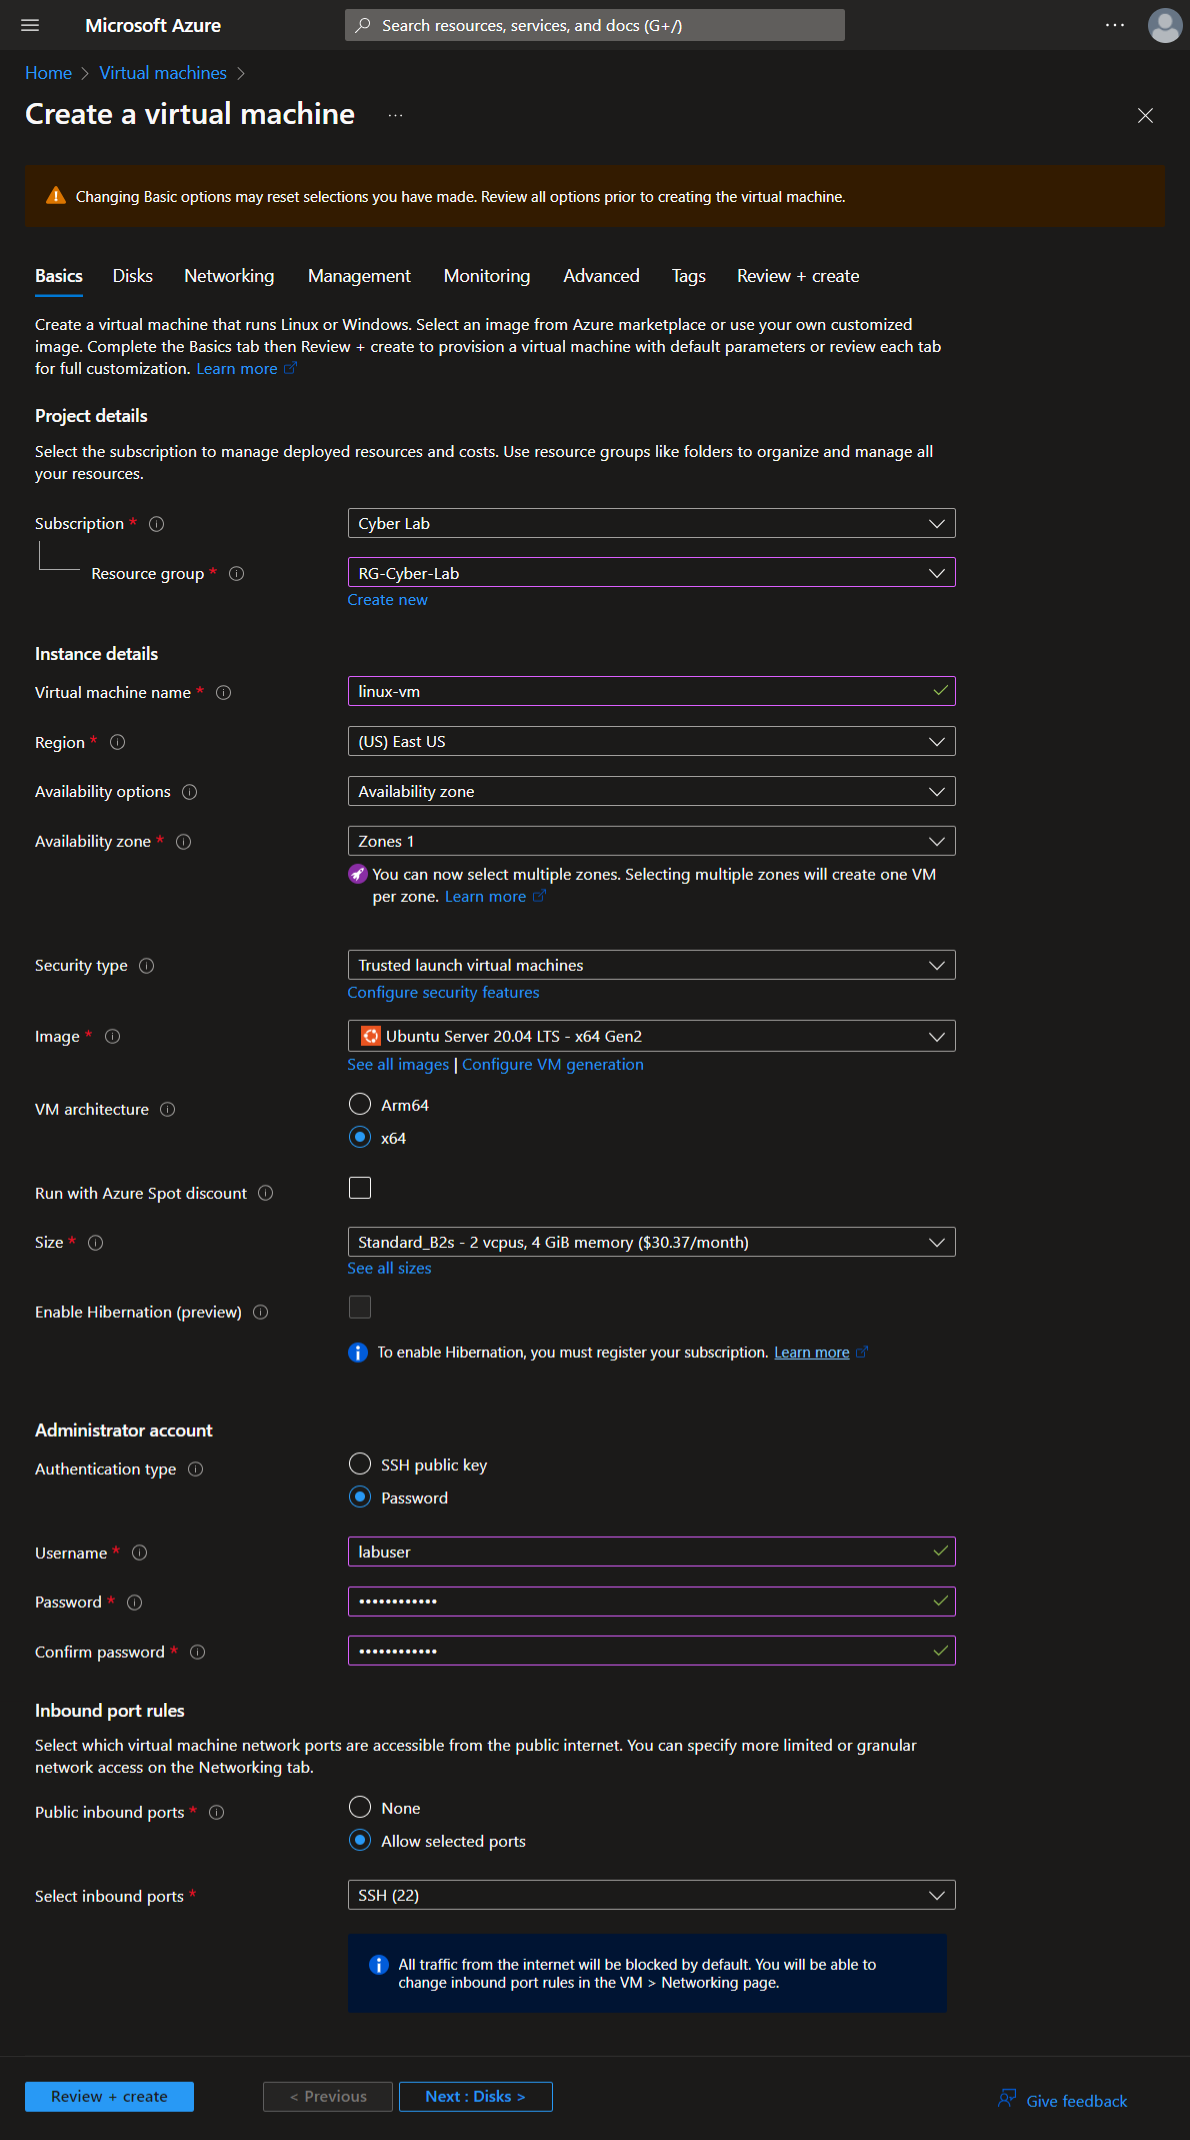
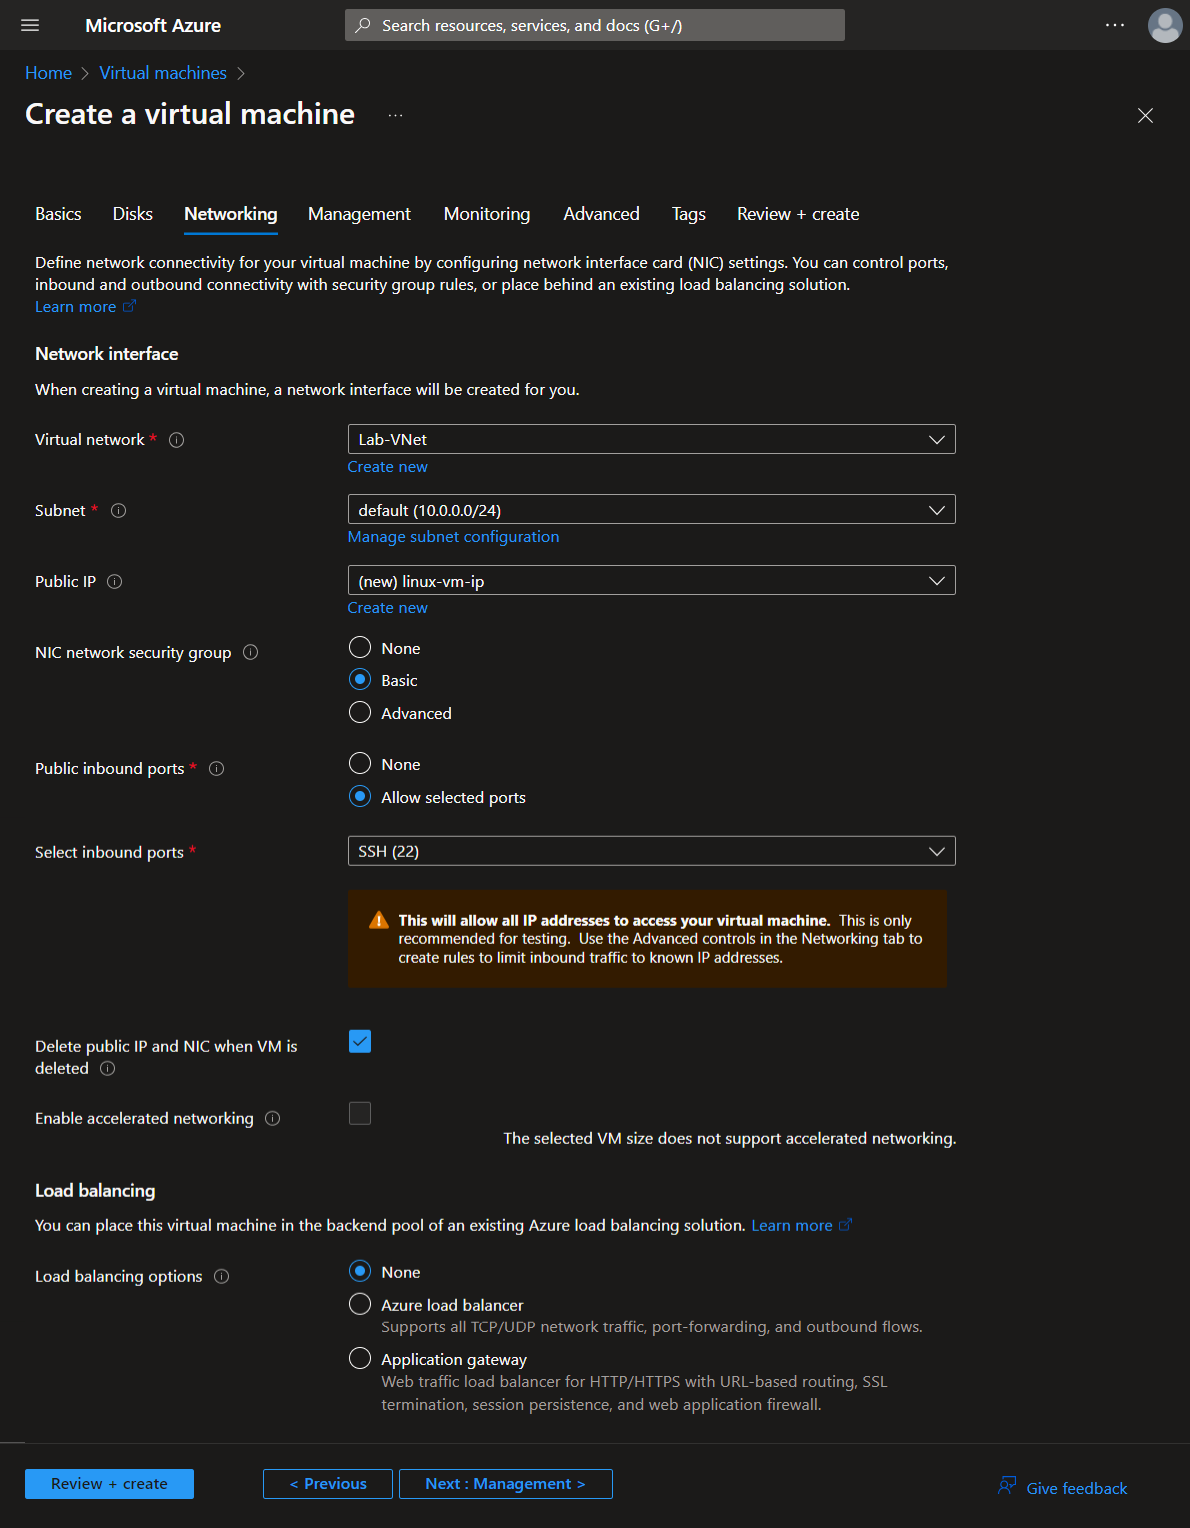
Next, create two VMs. One Windows VM and one Linux VM, using mostly default settings. Add both to the RG-Cyber-Lab resource group. Create a new Virtual Network the honeynet (Lab-VNet).
Create Windows VM
Basics tab:
Create a new Virtual Network:
Networking tab:
Create Linux VM
Create the Linux VM with the same user, region, resource group and networking settings.
Basics tab:
Networking tab:
Exposing the resources
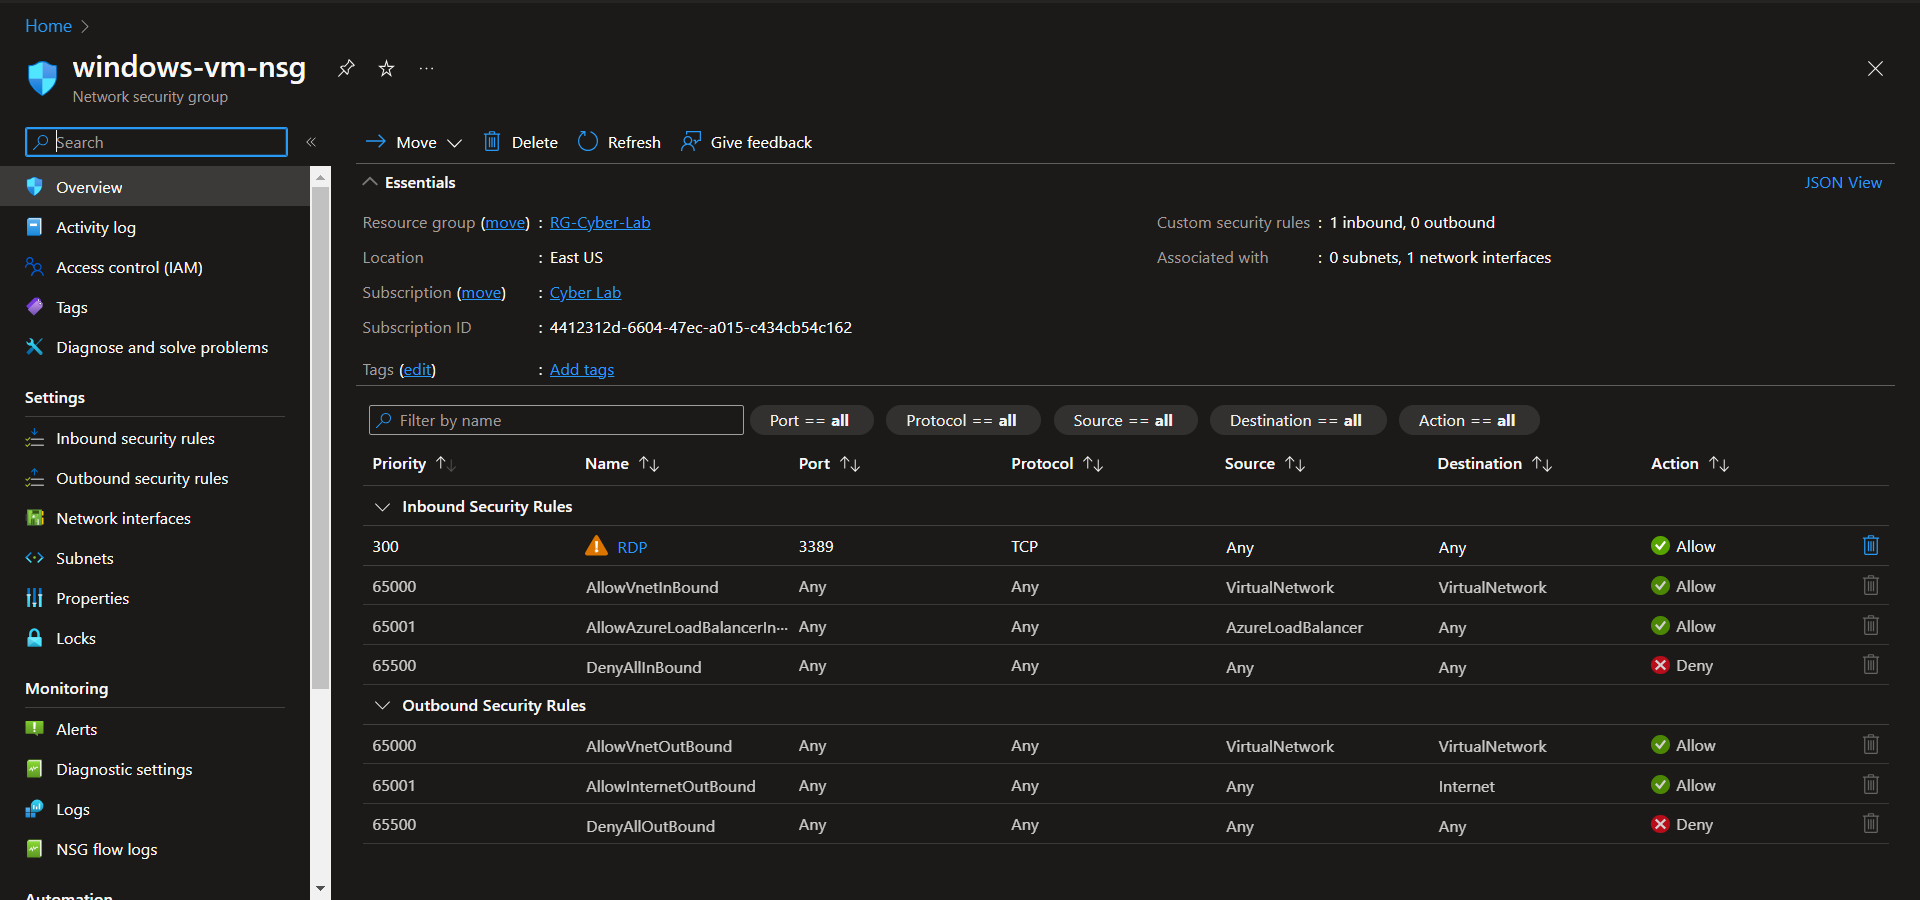
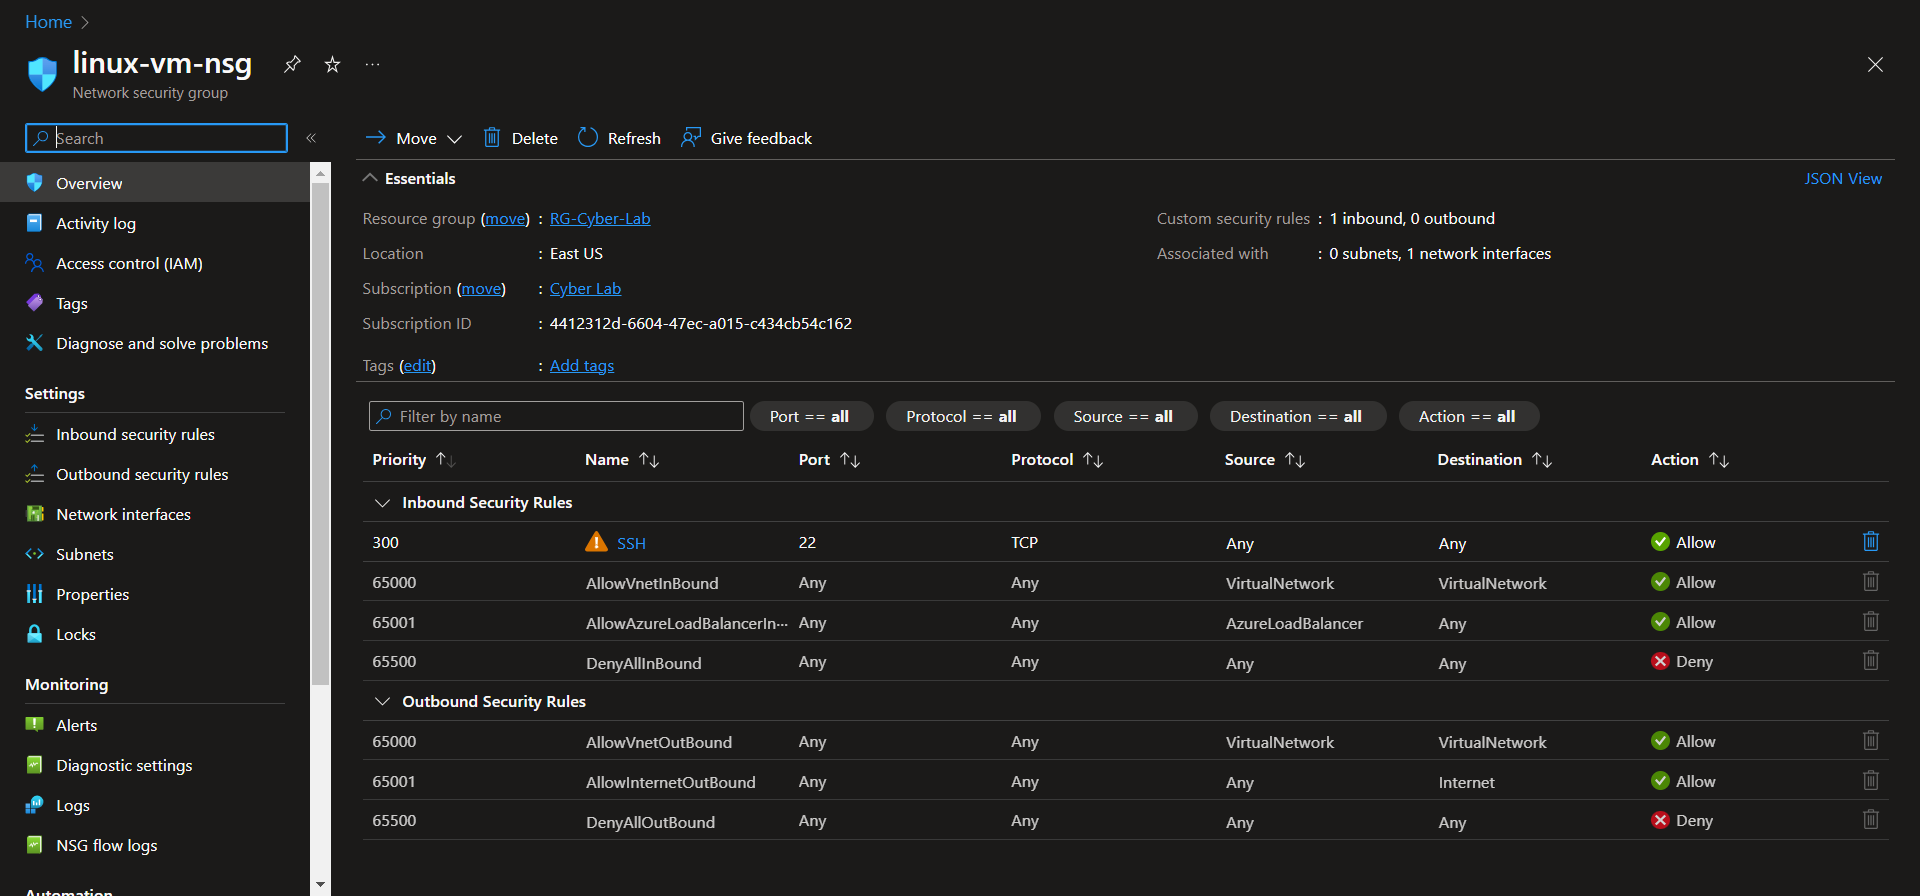
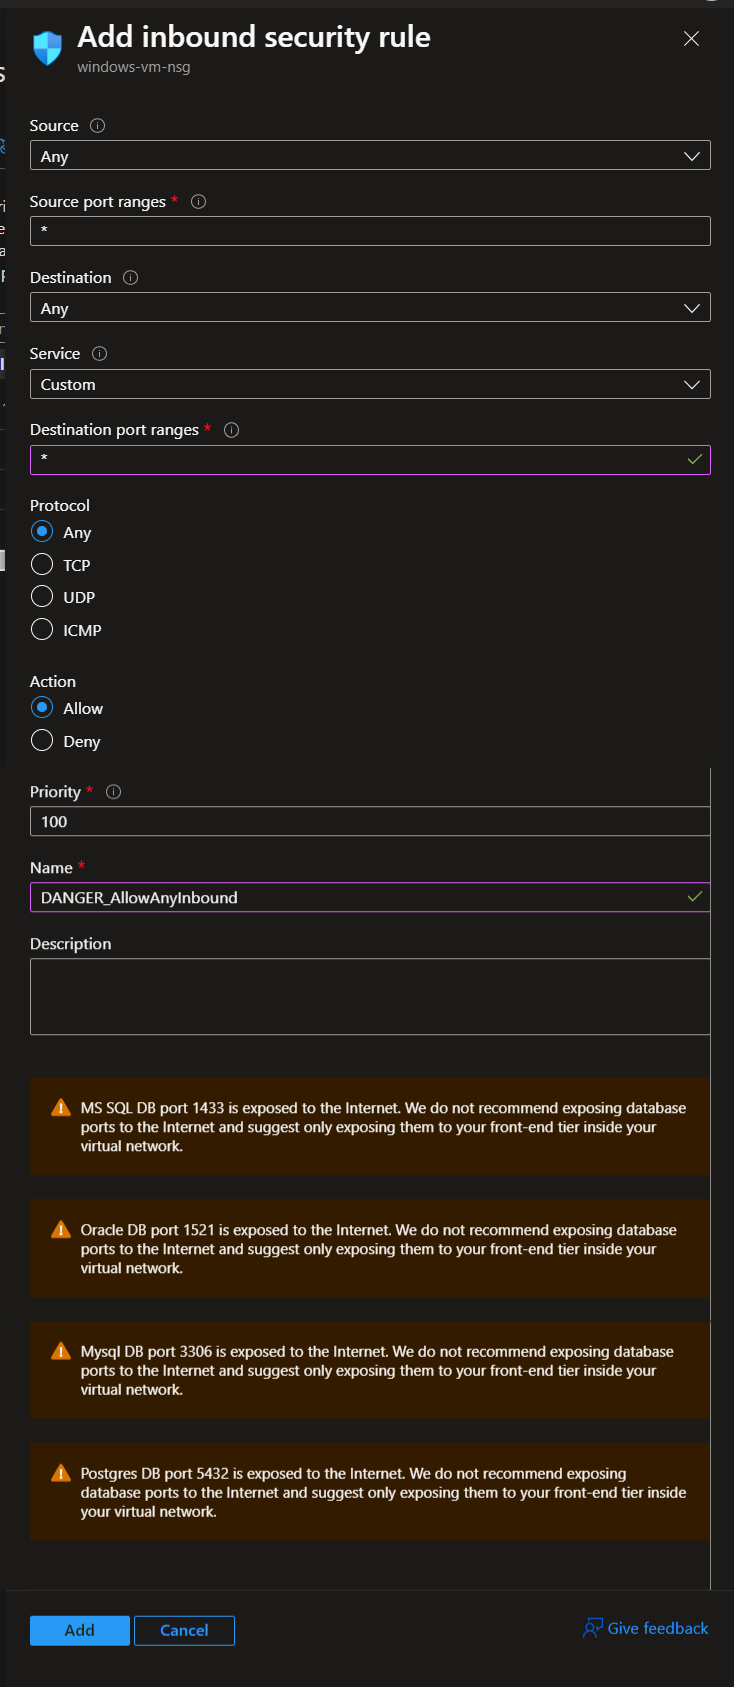
After both VMs are deployed, change both Network Security Groups (NSGs) to allow all inbound traffic. Removing rules for RDP and SSH and replacing with the custom inbound rule.
Windows NSG before:
Linux NSG before:
Custom Inbound Rule:
Windows NSG after:
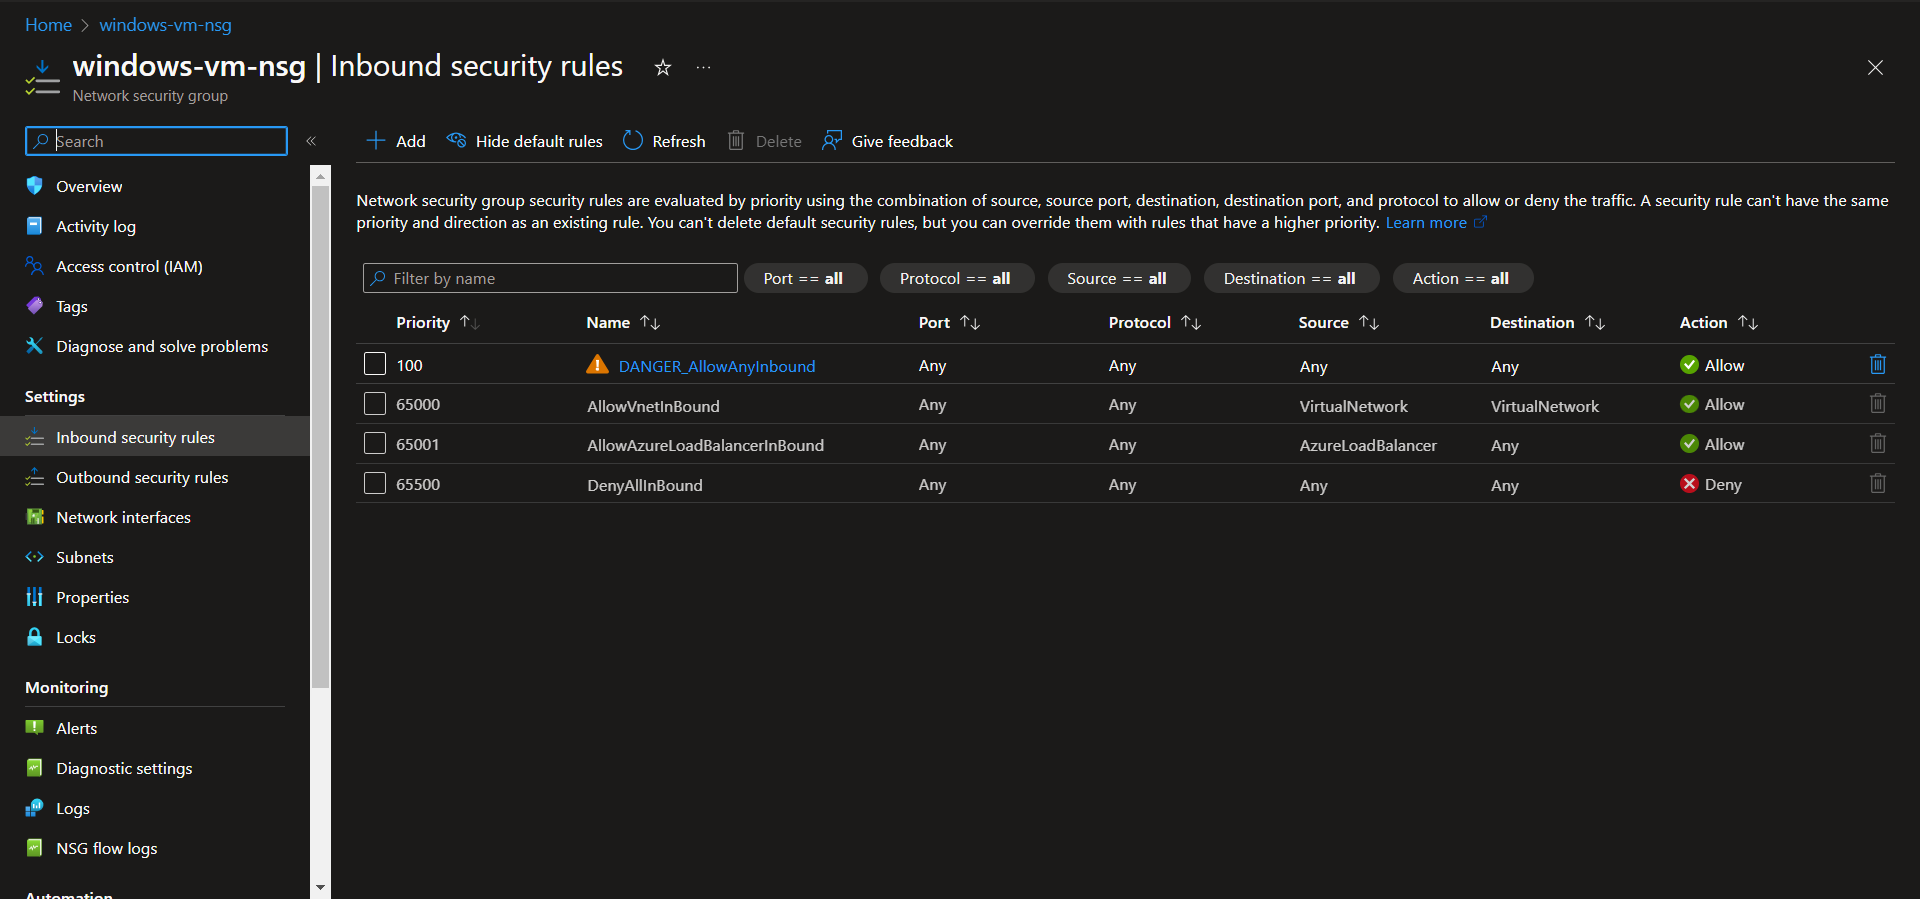
At this point both NSGs are identical.
Create Vulnerabilities
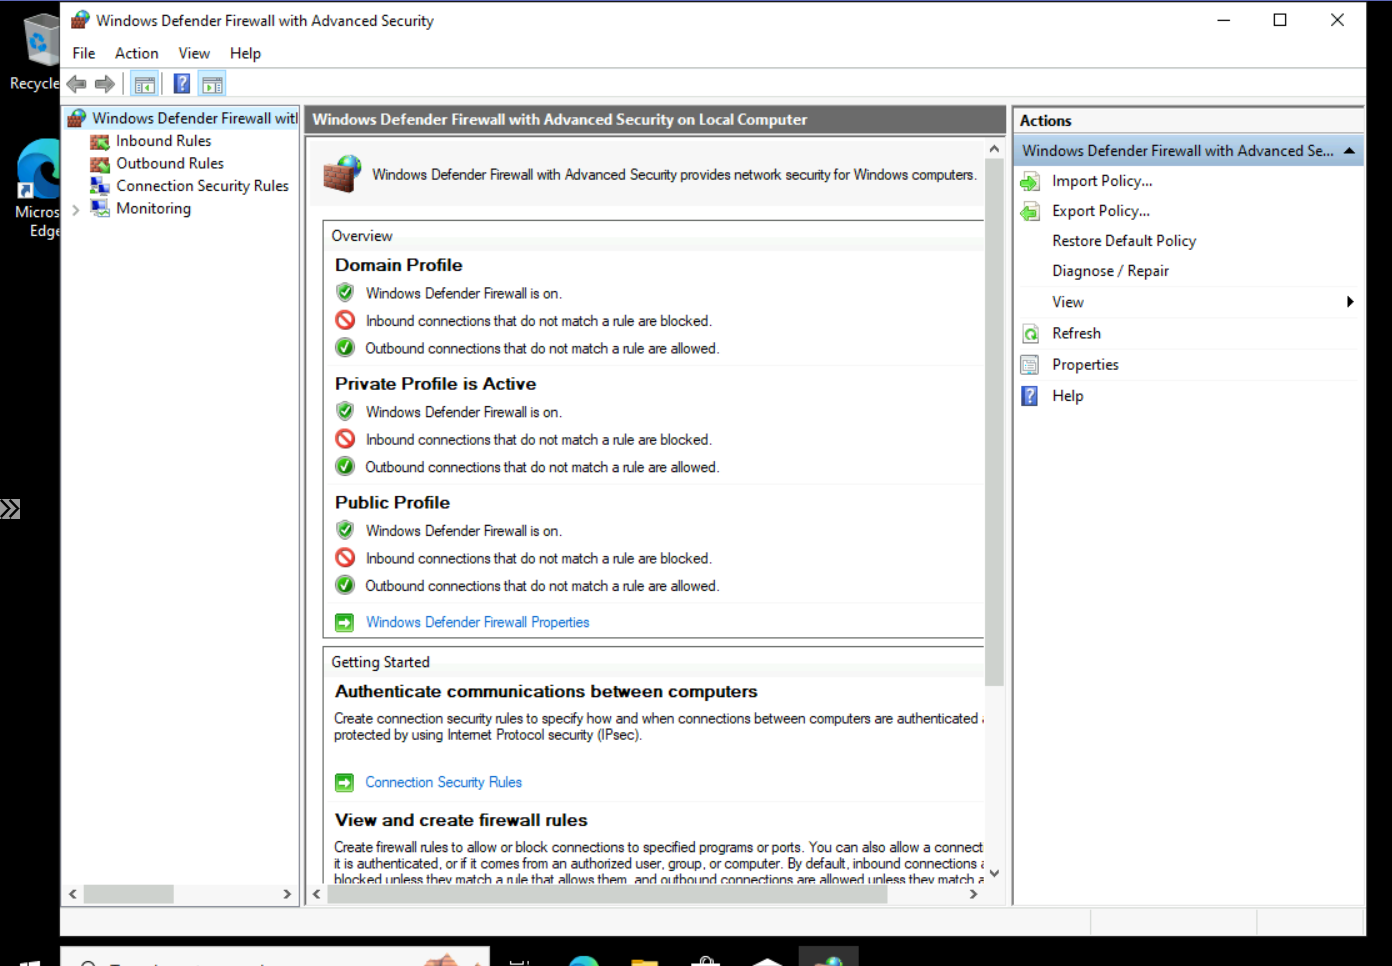
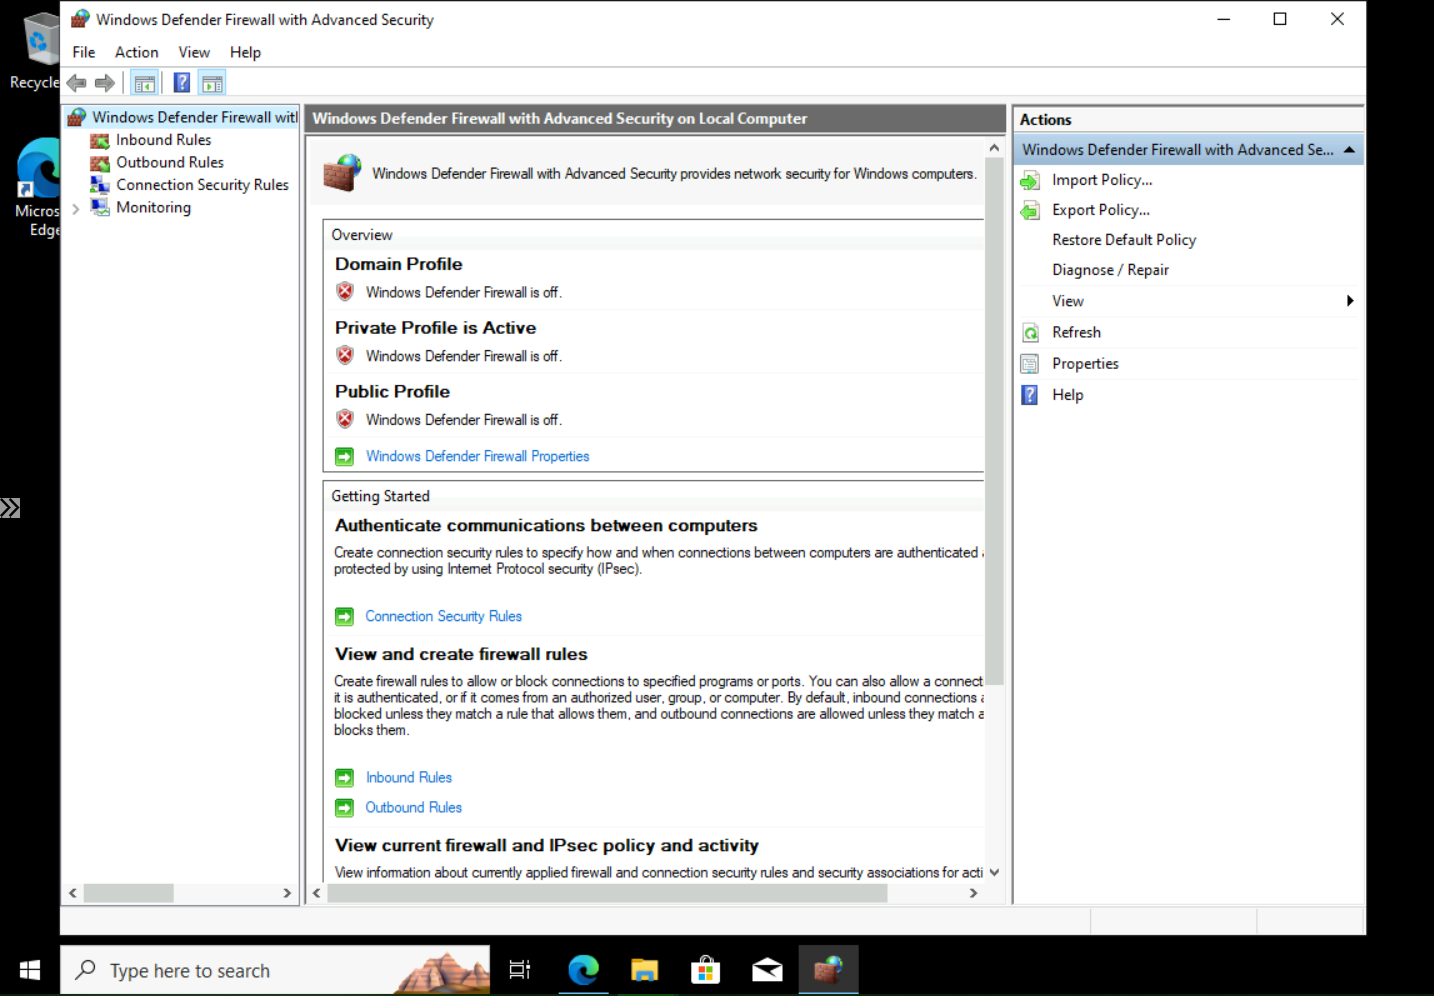
Disable Windows Firewall
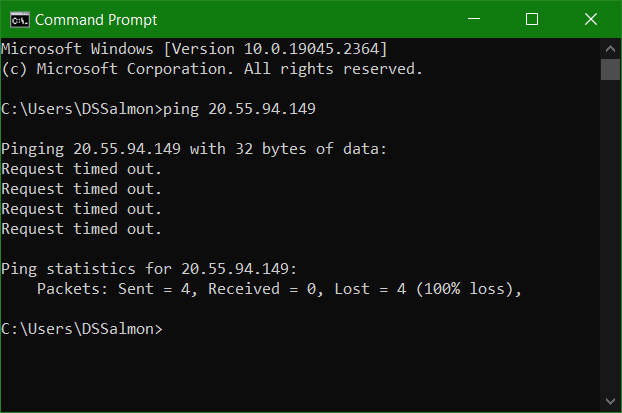
The goal is to expose these VMs to threat actors and to make them both discoverable and reachable so that we can monitor, log and investigate incidents later. By default Windows Firewall, blocks ICMP packets from the internet. You can see that from another network the windows-vm is unreachable.
From here, disable the firewall (wf.msc).
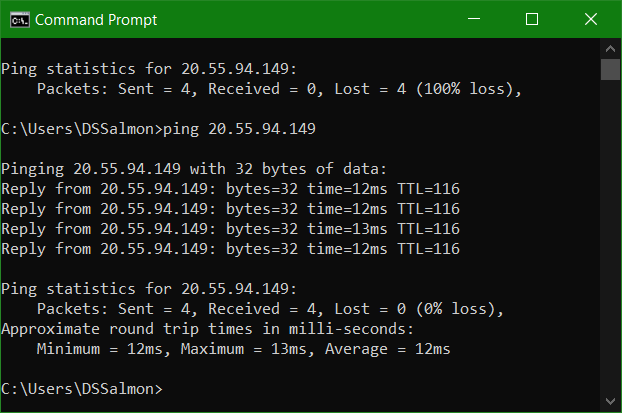
Before
After
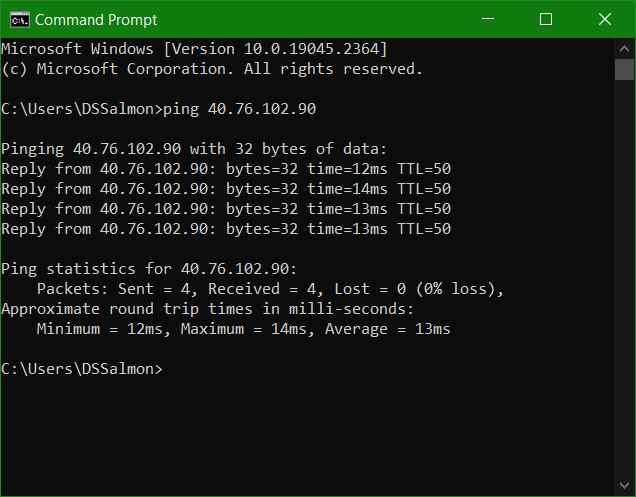
Pinging windows-vm again to test success
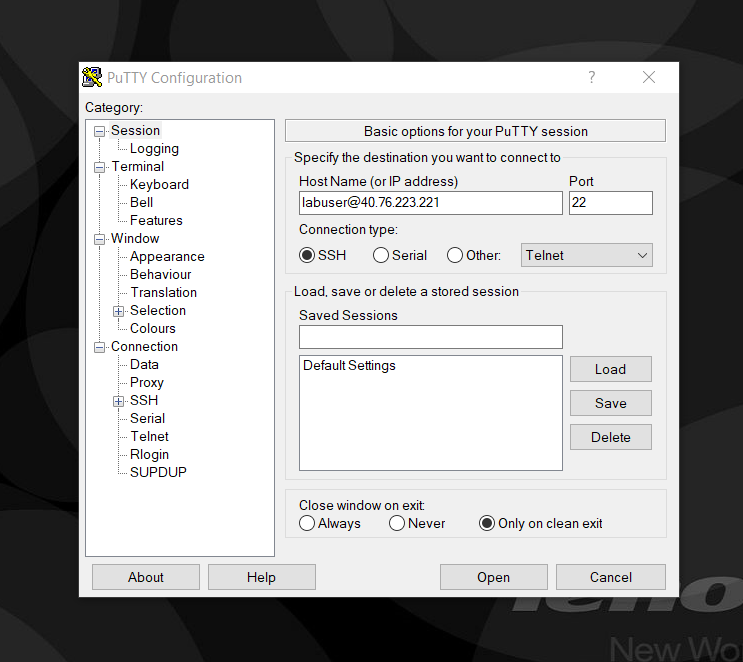
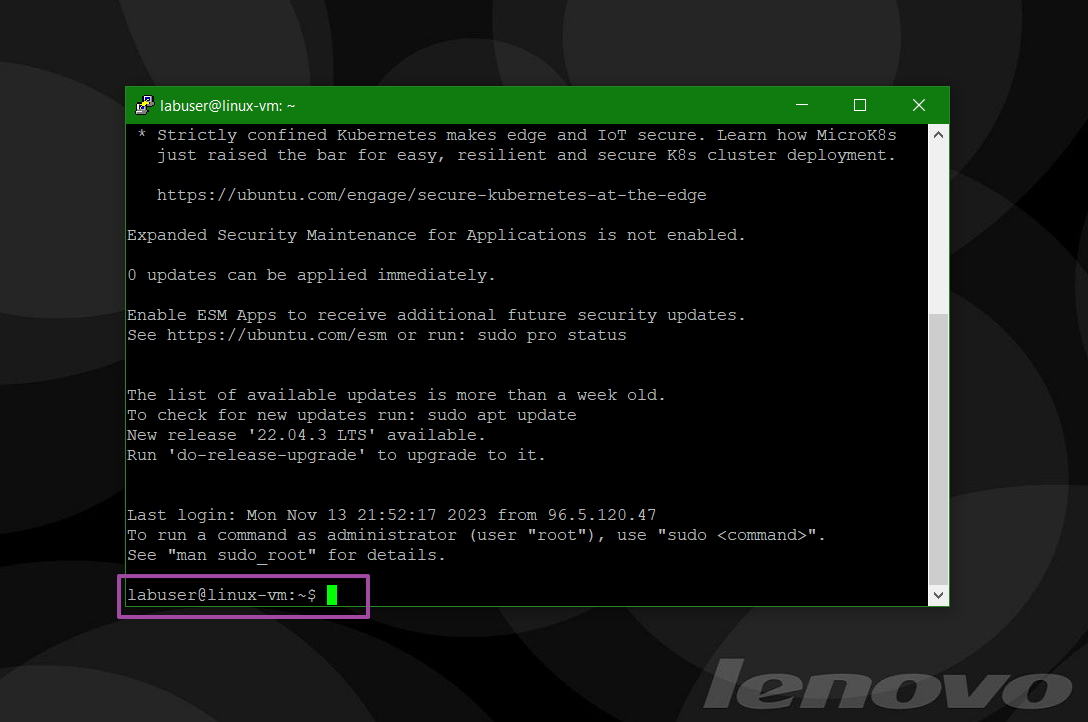
Connecting to the linux-vm via SSH using PuTTy
Test pinging linux-vm externally
Install MS SQL Server + Utilities
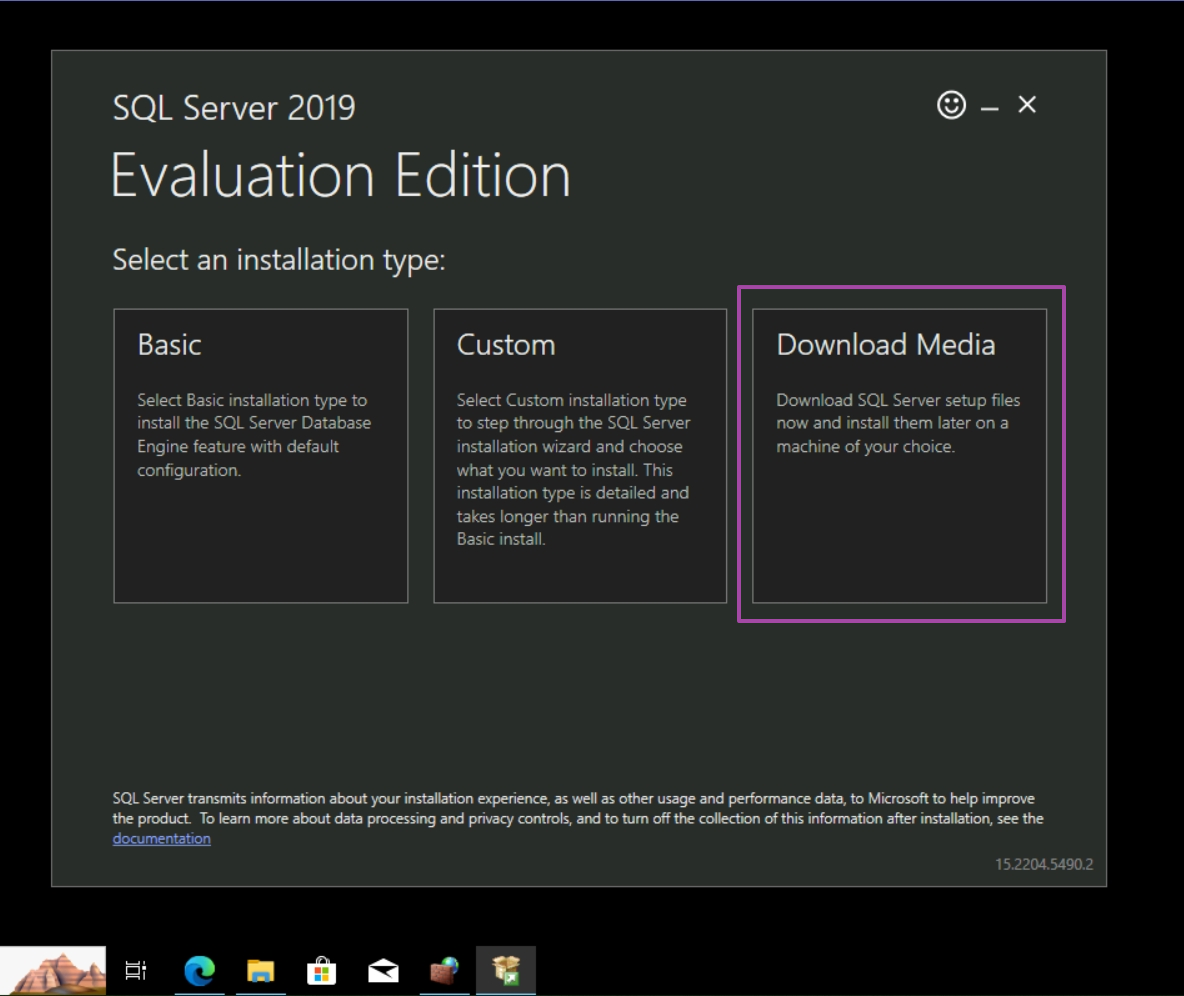
Next, download and install SQL Server Evaluation.
Select Download Media.
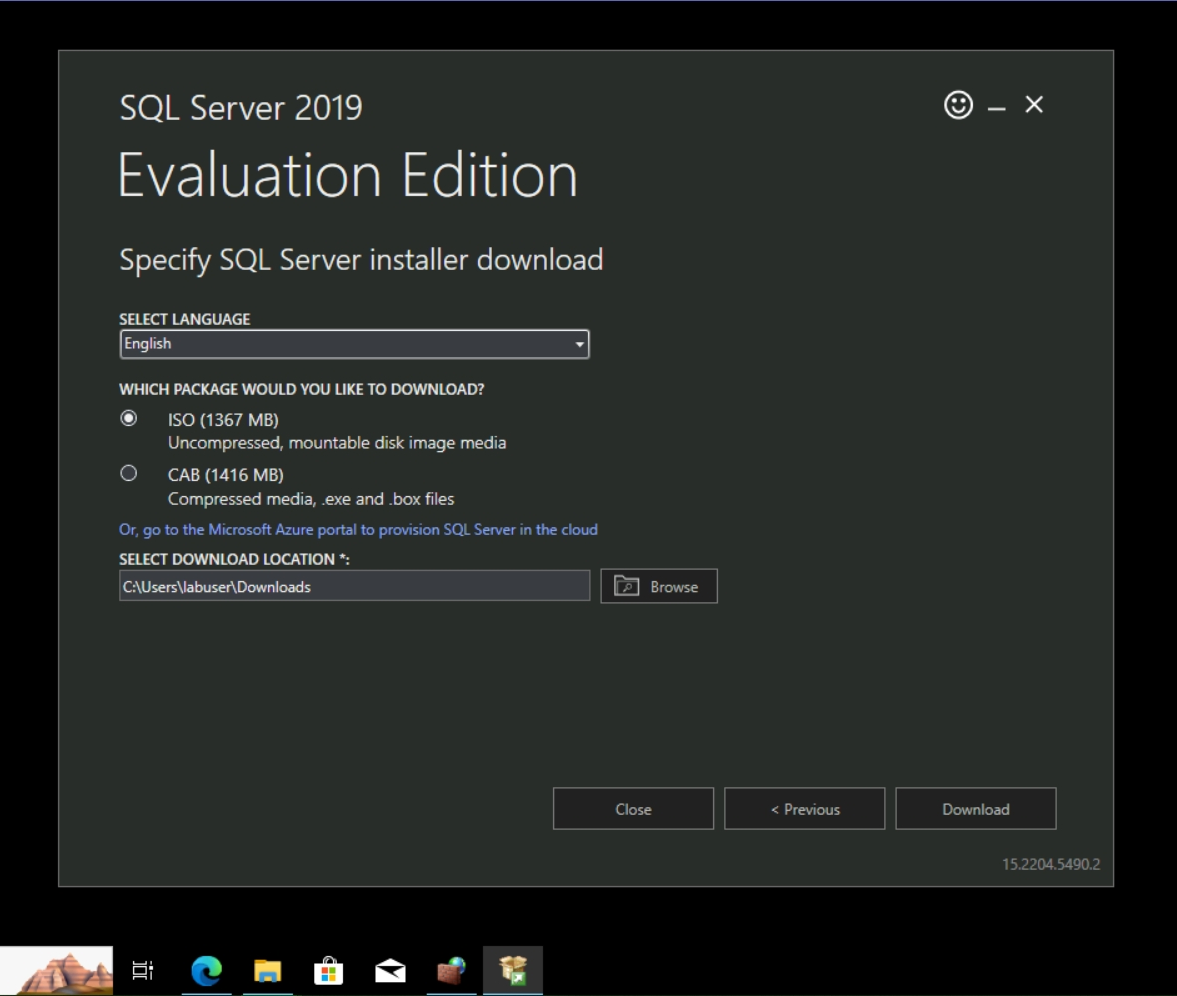
Select ISO and download location.
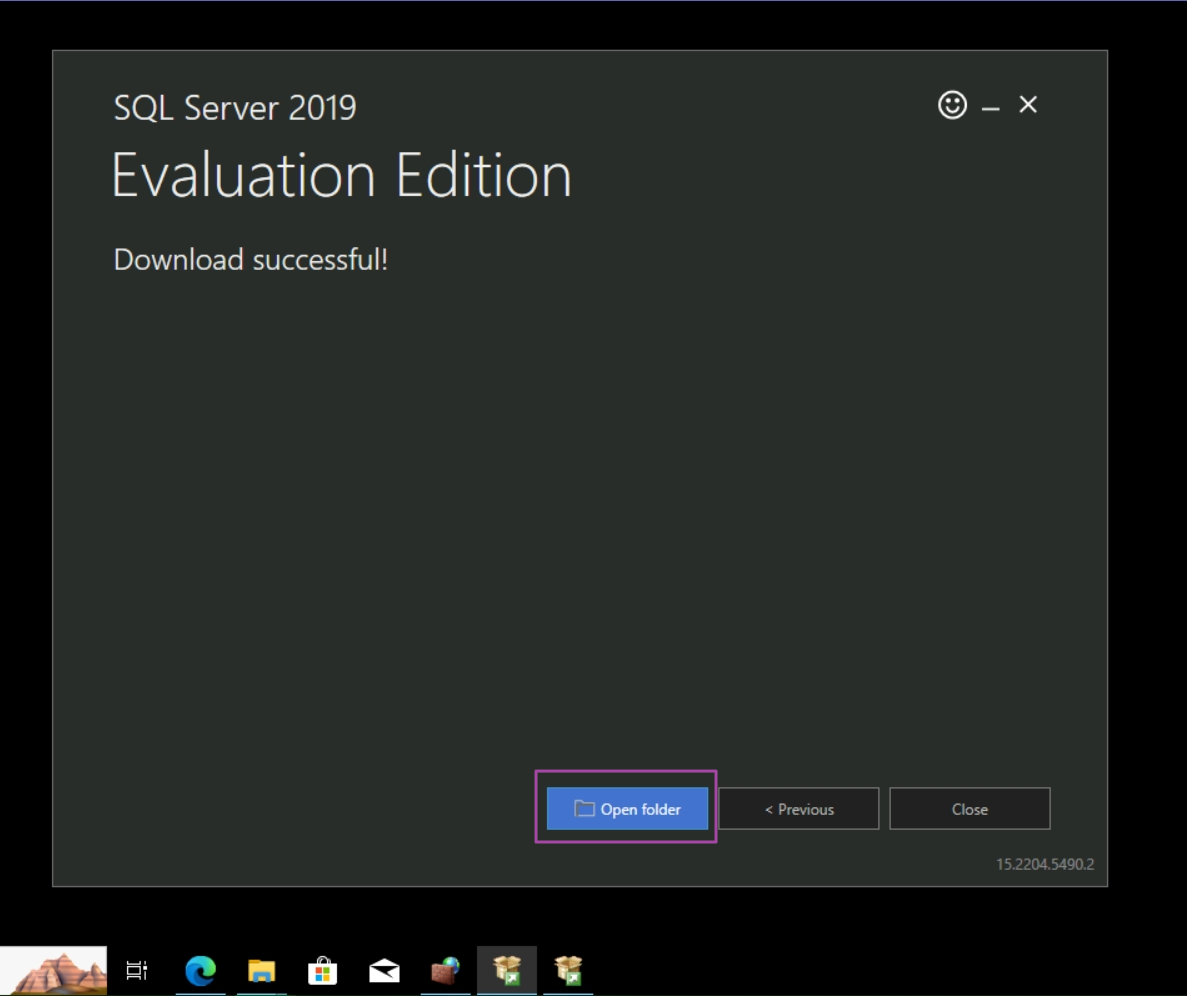
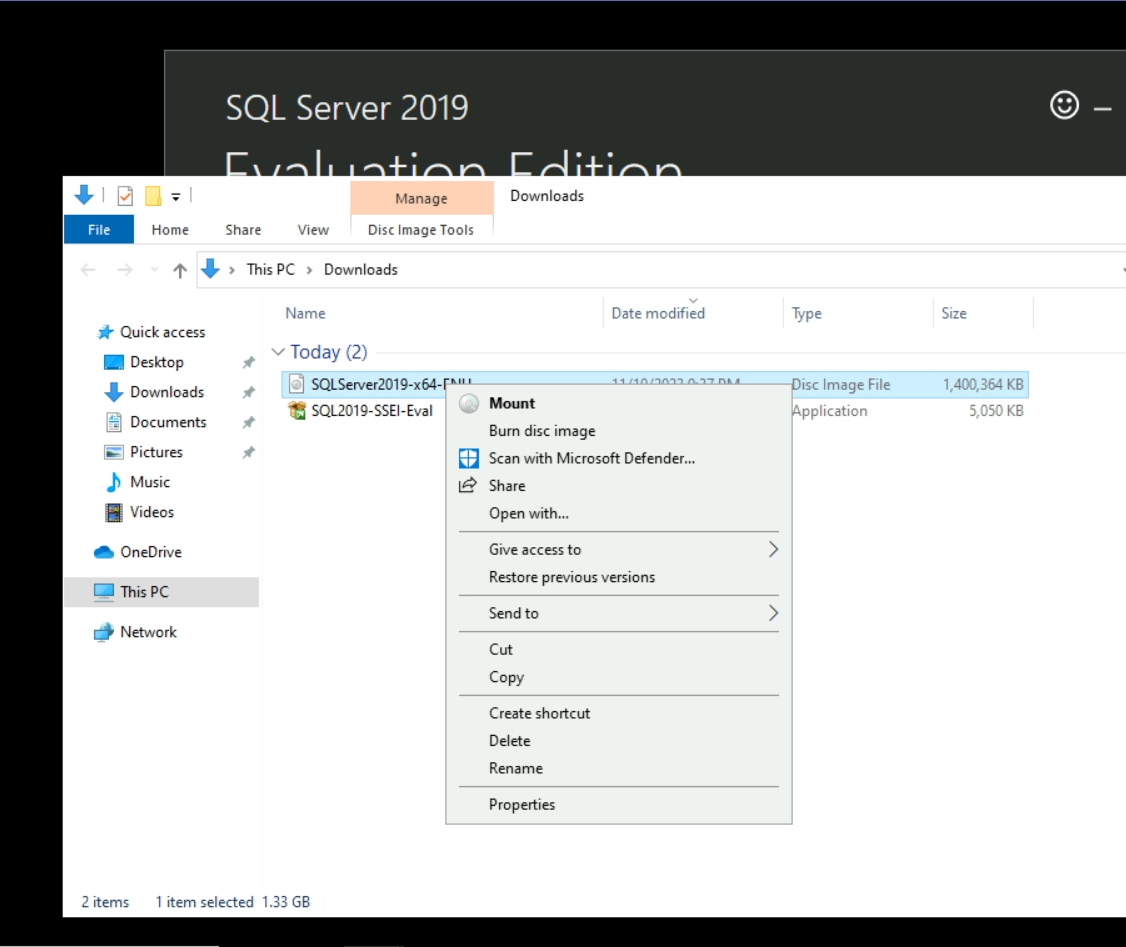
Once the download completes, go to download location.
Mount the ISO.
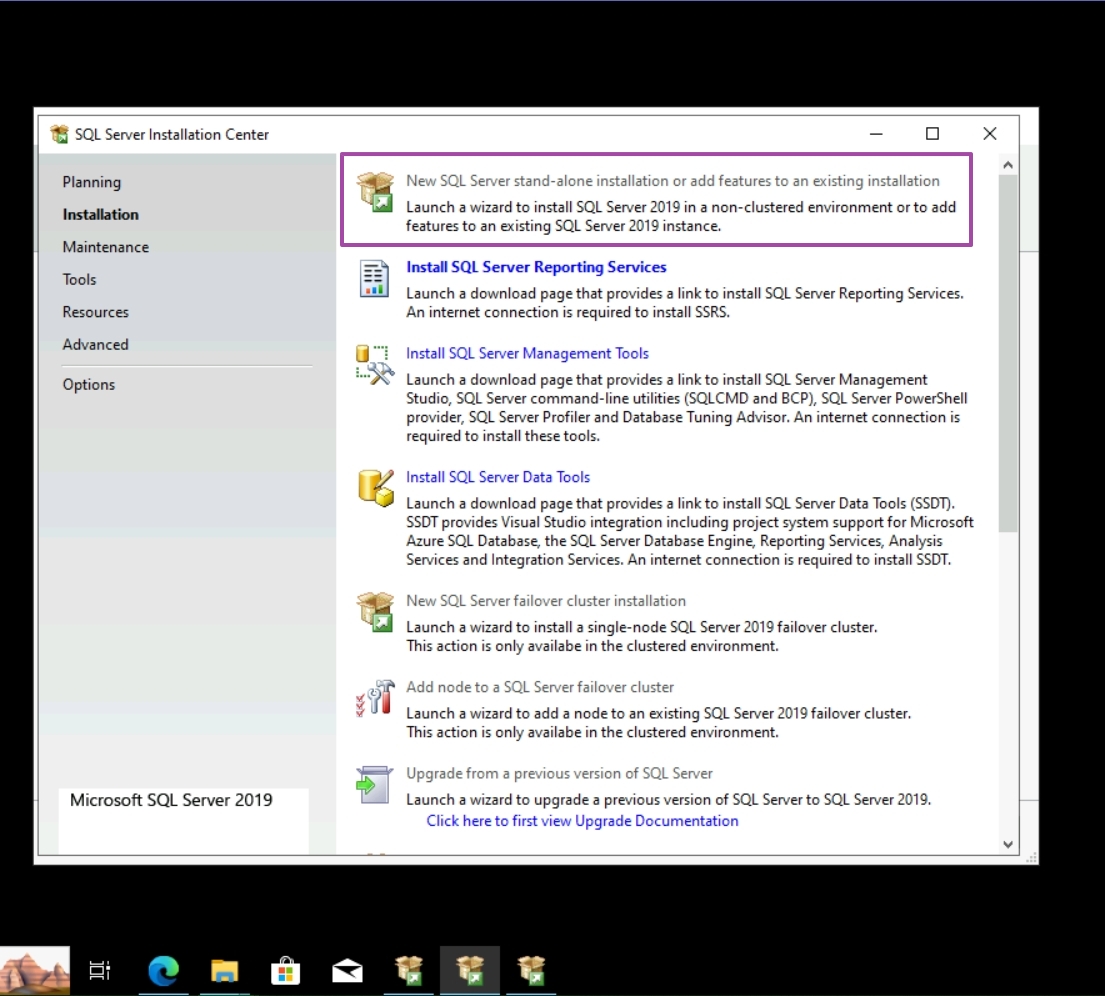
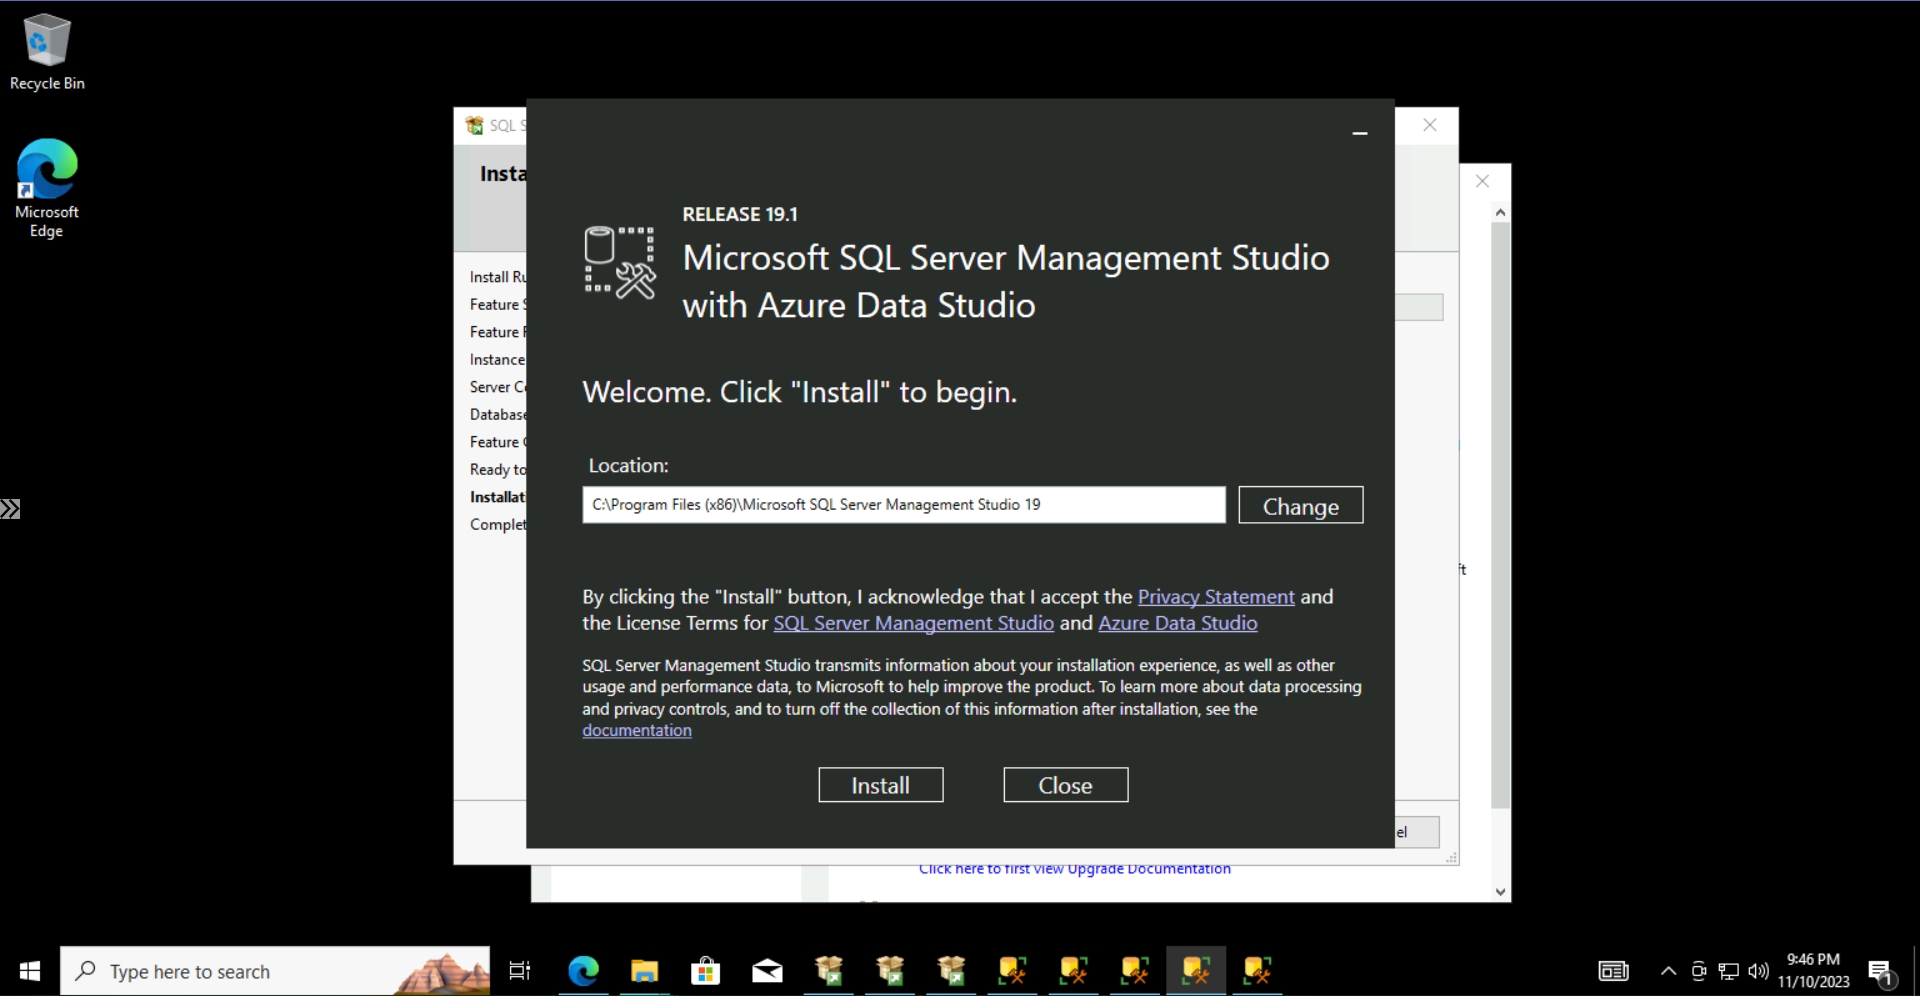
Run the installer.

Select New SQL Server
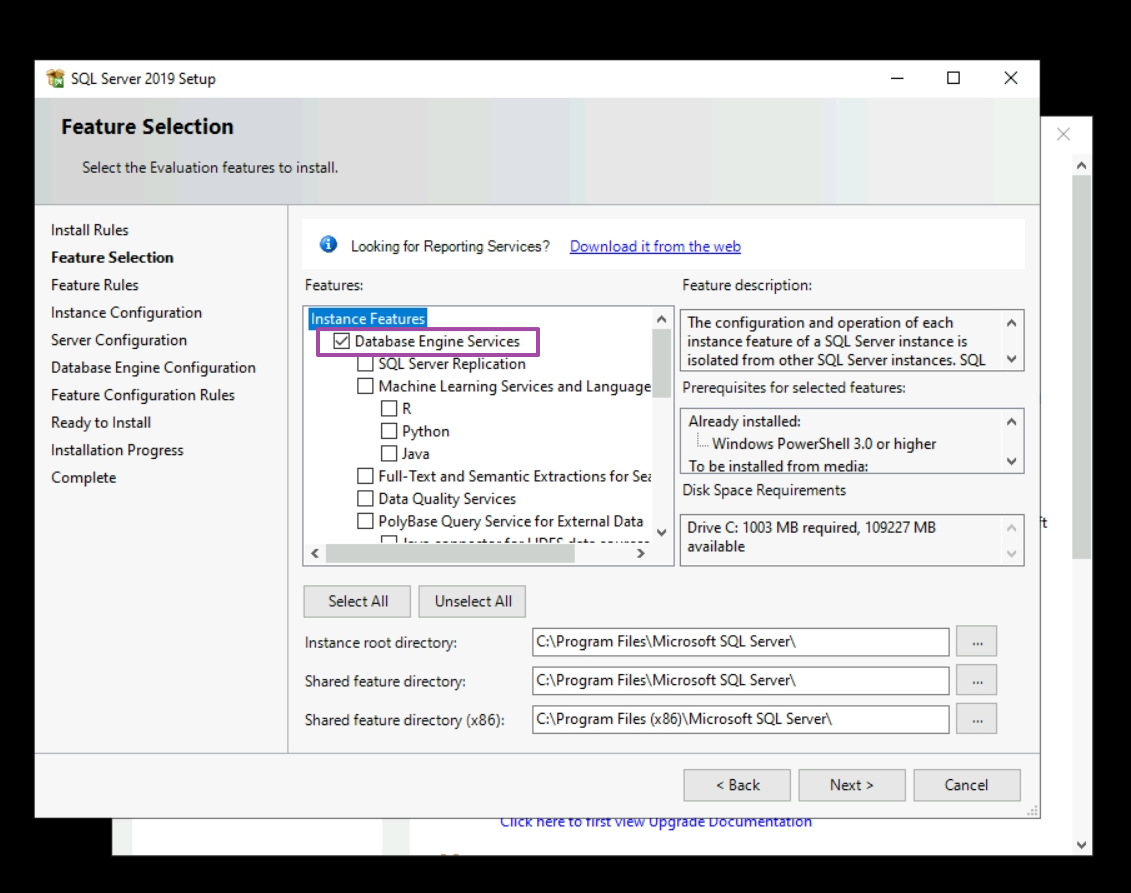
Include Database Engine Service
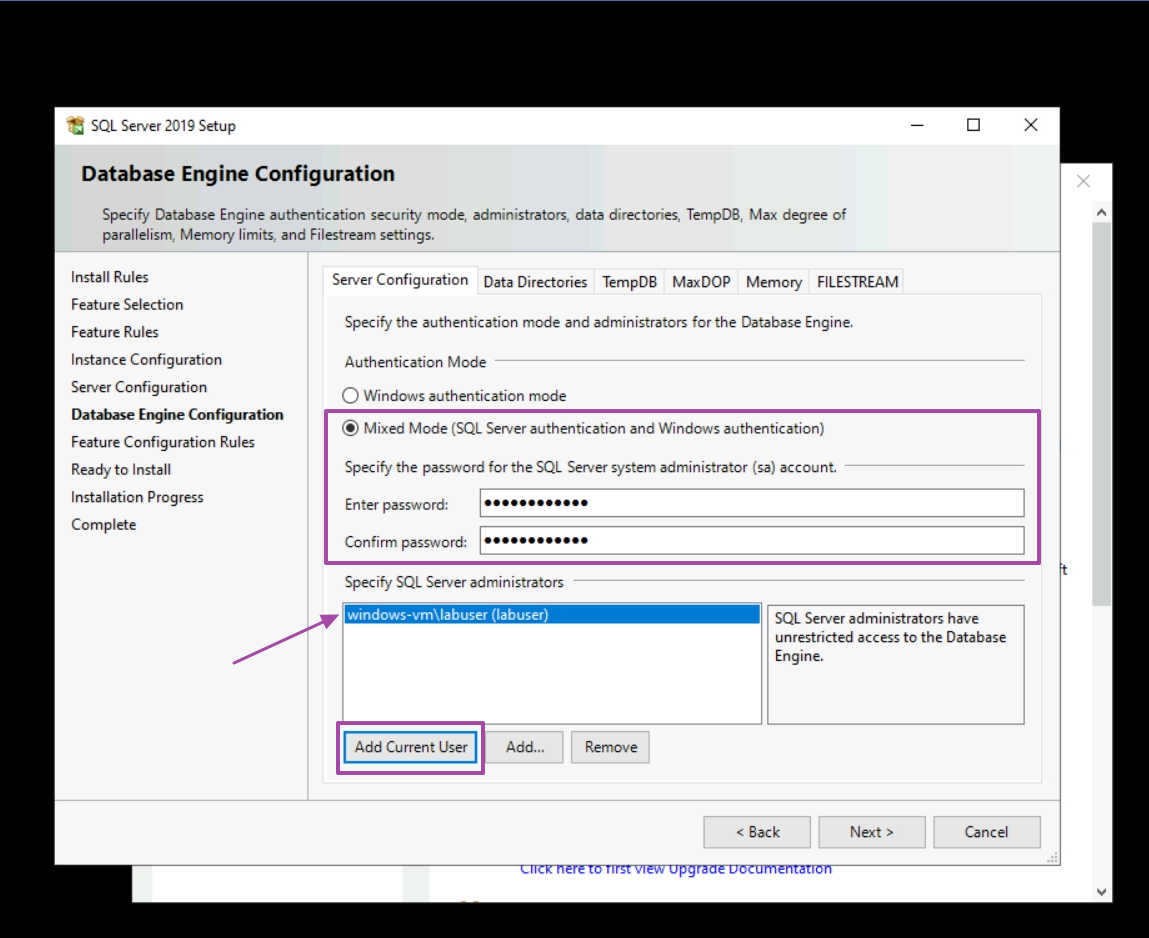
Select Mixed Mode, create a user and select add current user to also allow for Windows authentication using labuser.
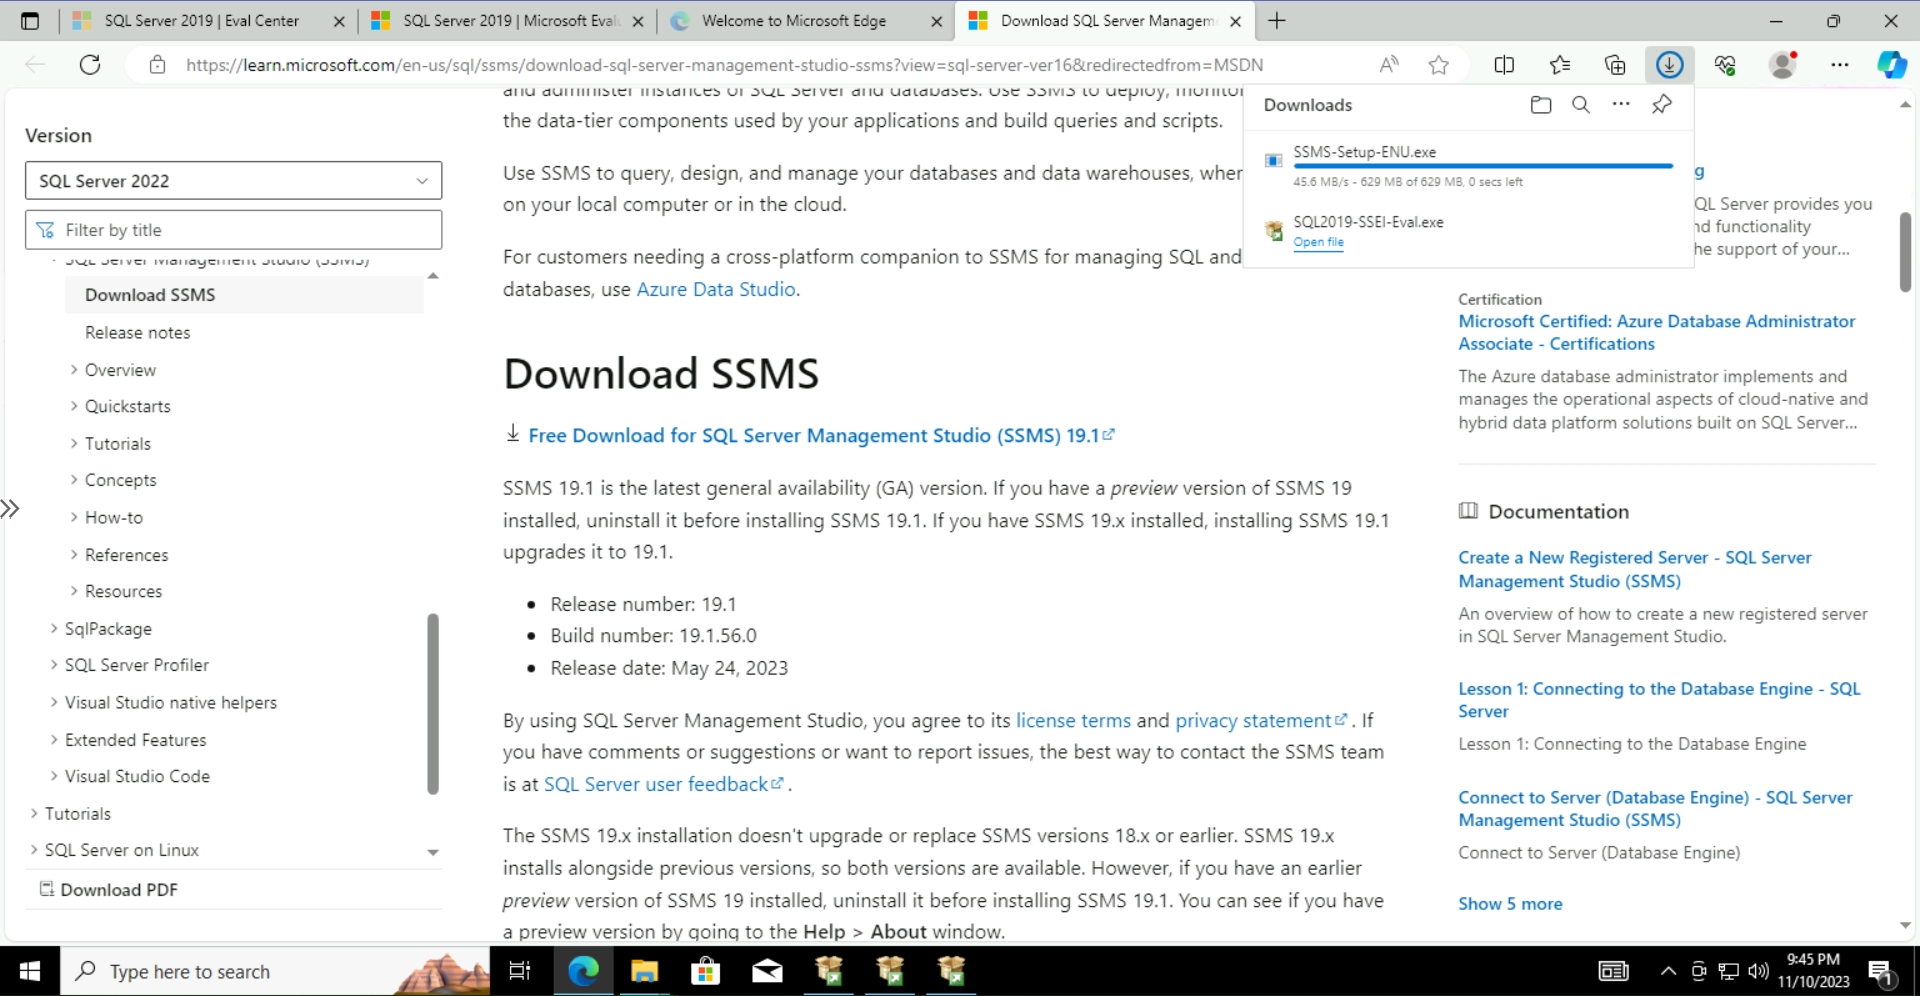
Once the installation completes, download and install MS SQL Management Studio (SMSS).
Once the installation completes, restart the VM.
Enable Logging on SQL Server
After restarting, follow the Microsoft documentation for adjusting settings to allow SQL Server logs to be ported to Windows Event Viewer.
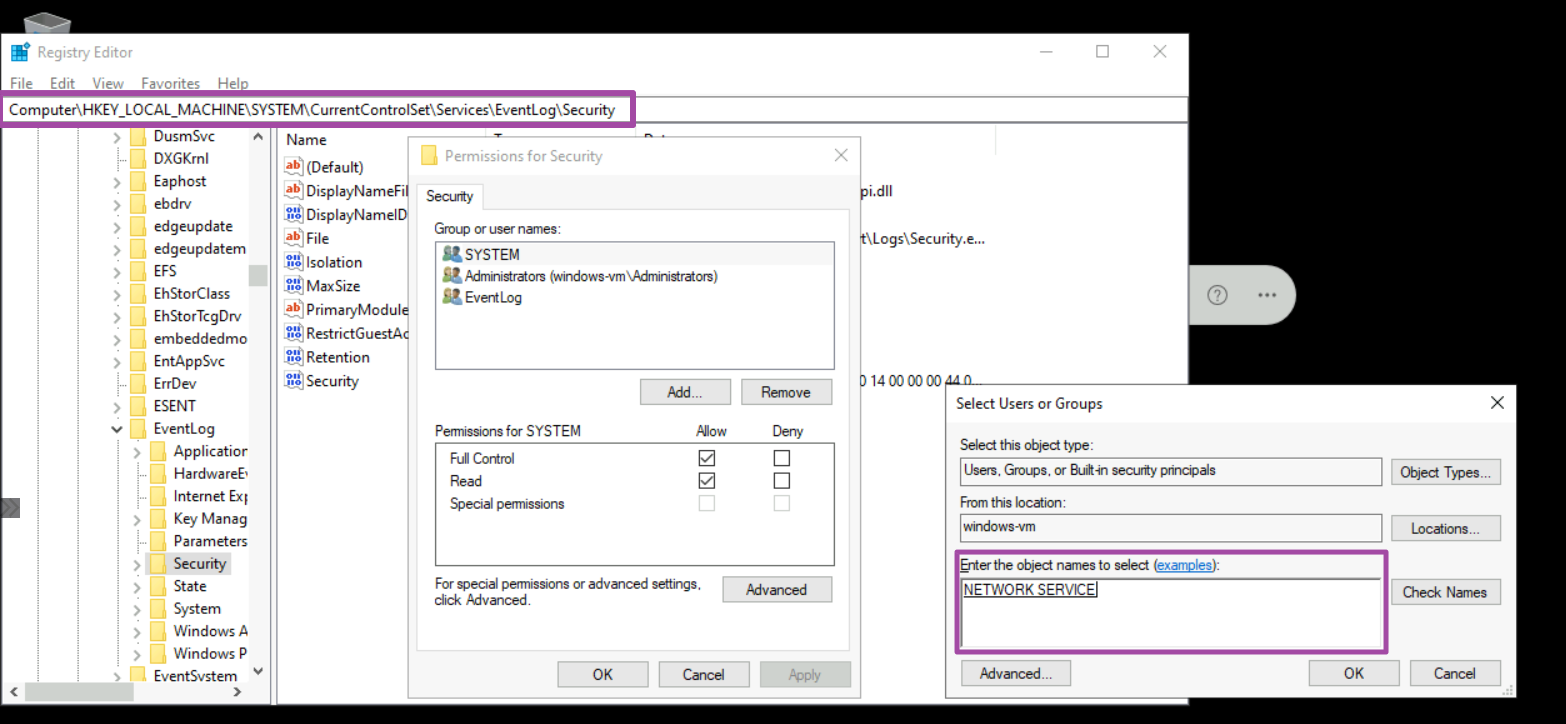
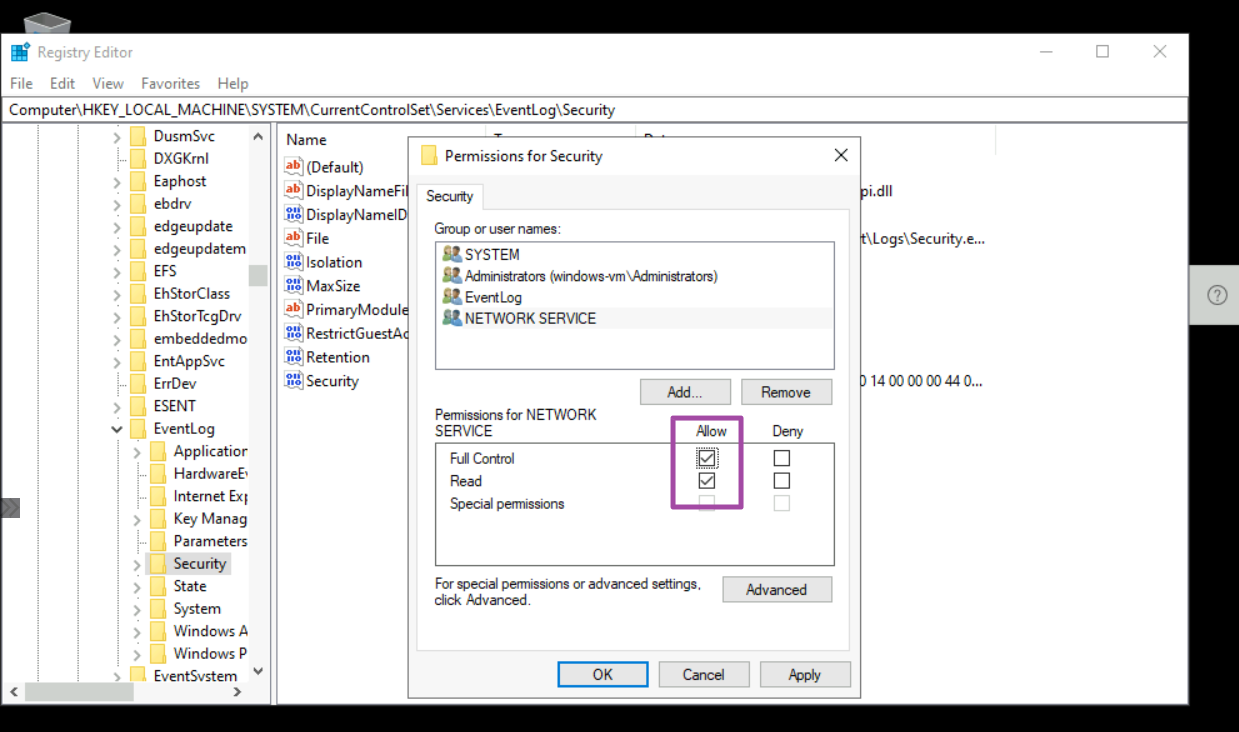
Provide full permission for the SQL Server service account (NETWORK SERVICE) to the registry hive.
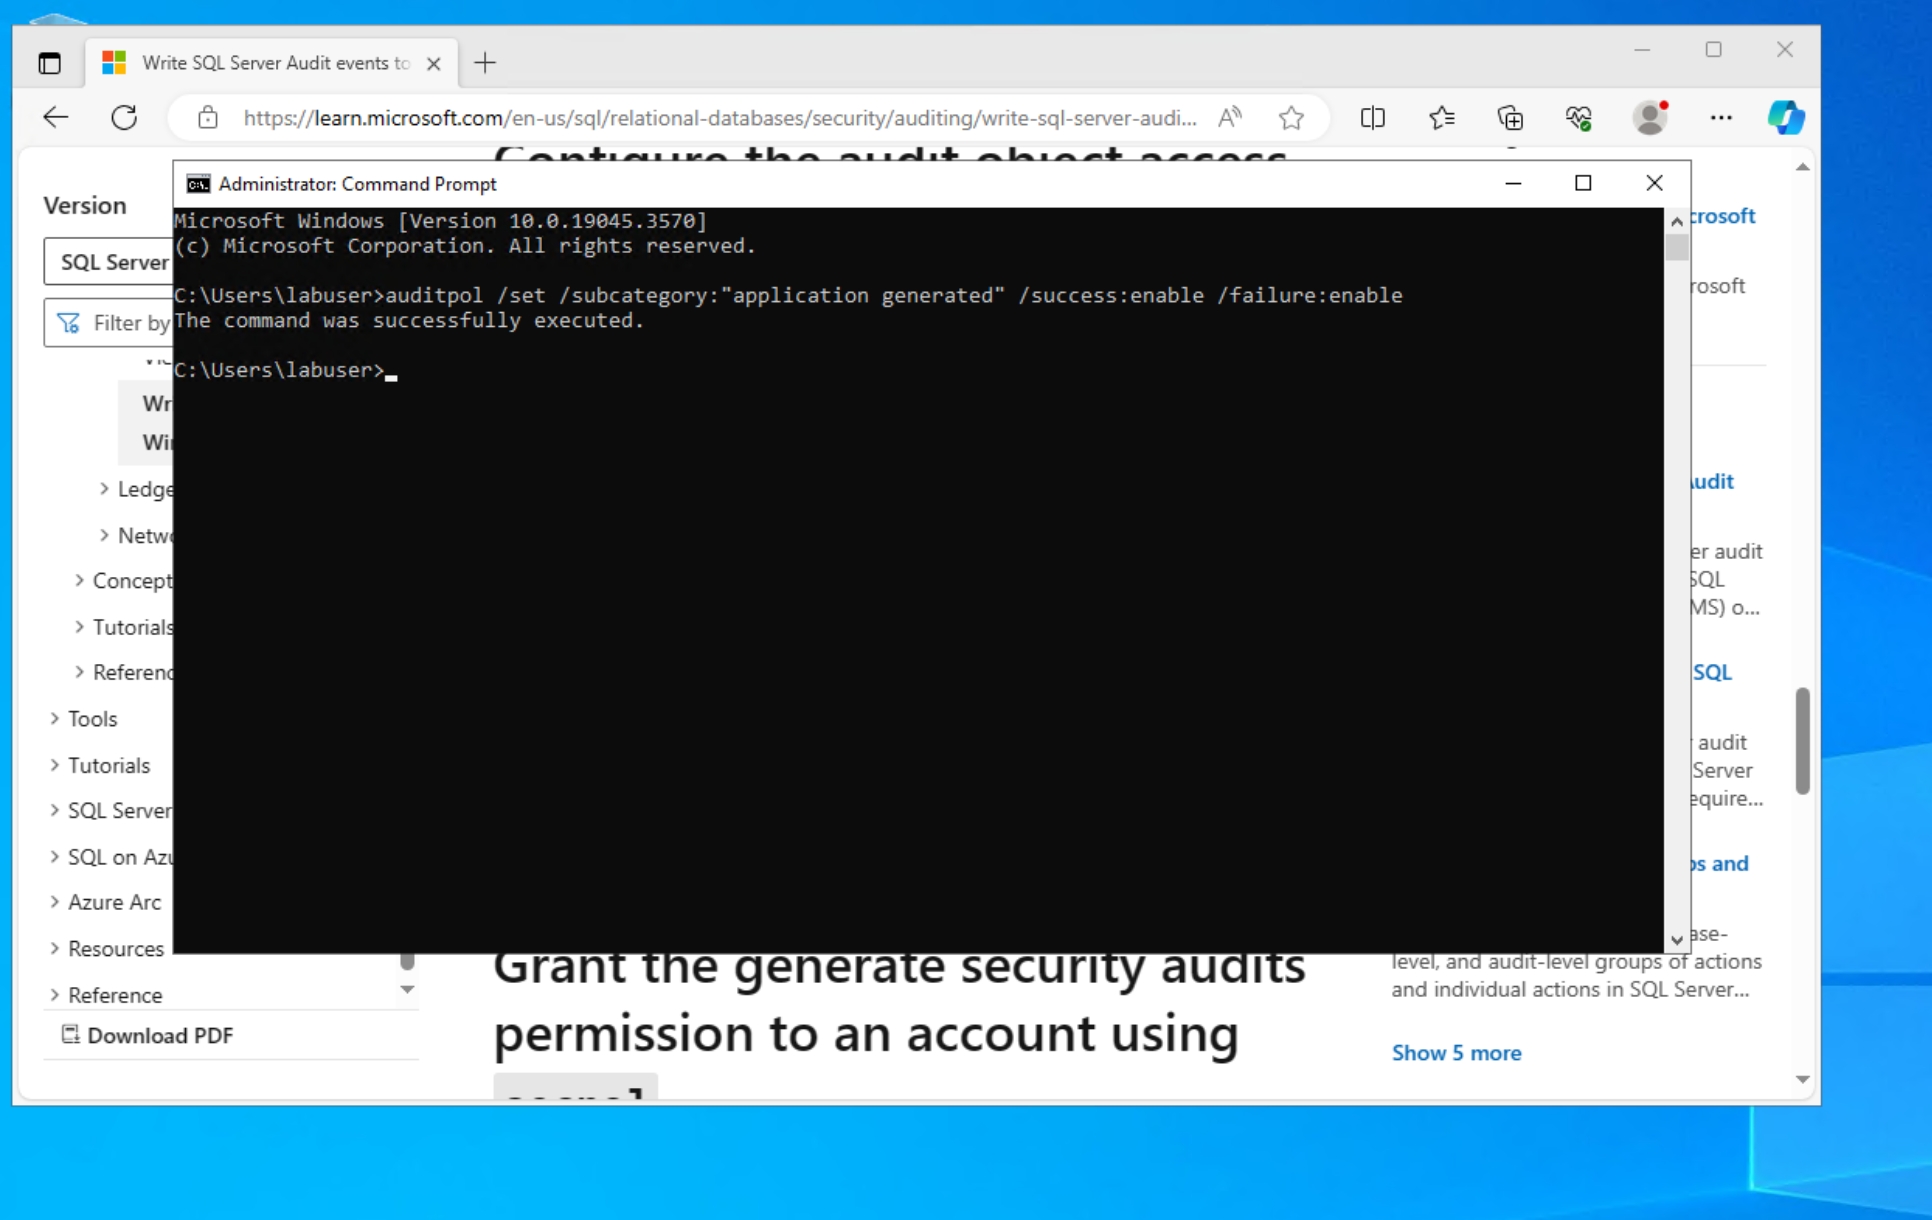
Configure the audit object access setting in Windows using auditpol by executing the provided command line statement.
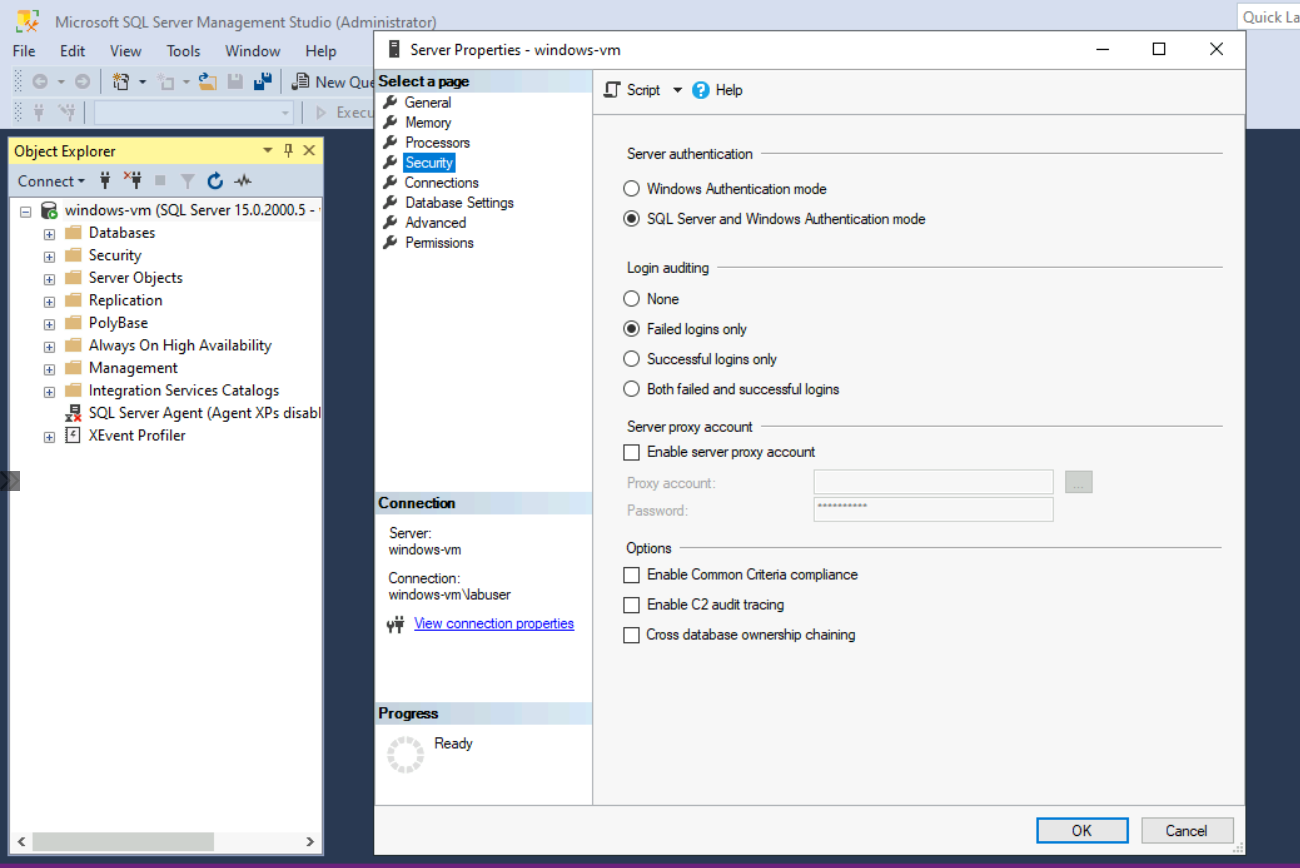
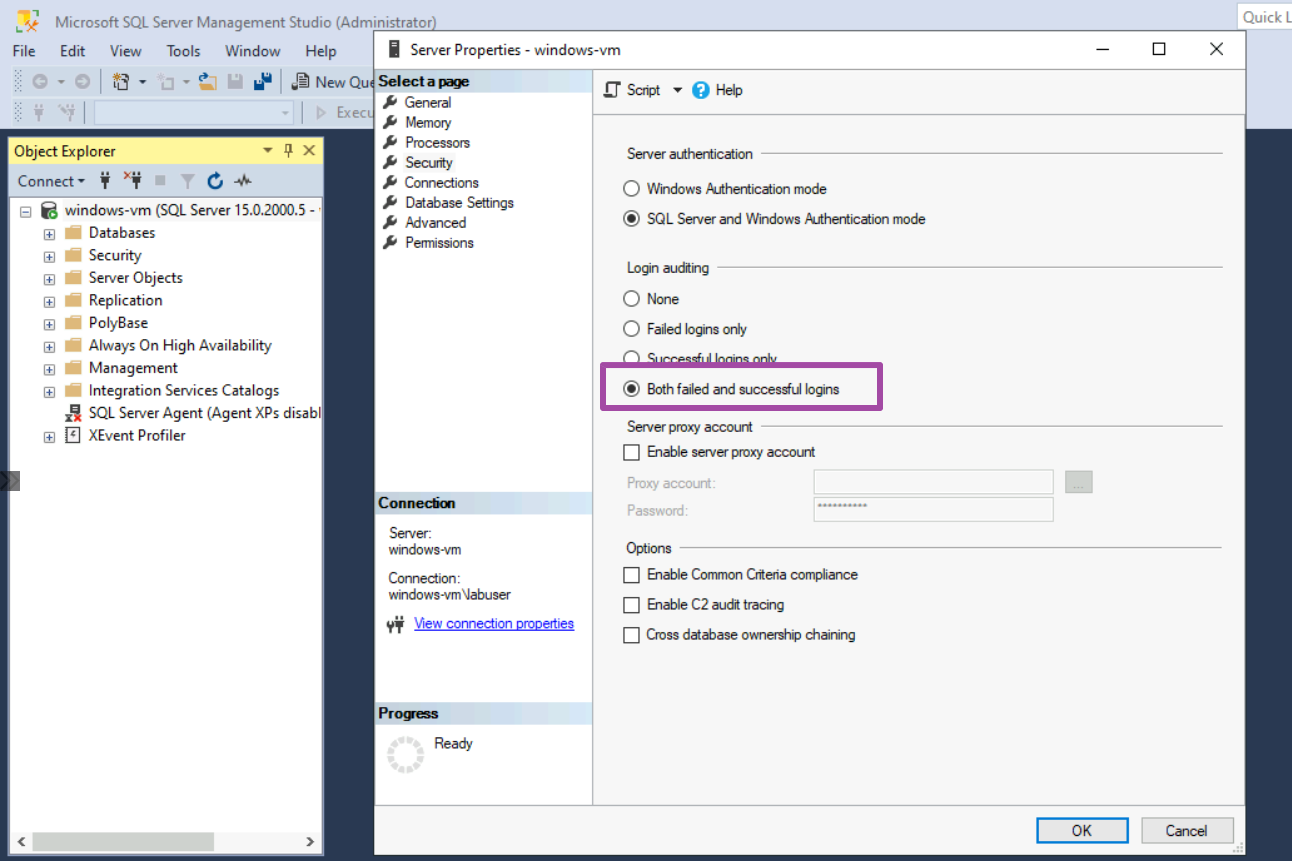
Launch SSMS and log in to the SQL Server. Then go to Properties > Security > Enable both
Security Settings Before
Security Settings After
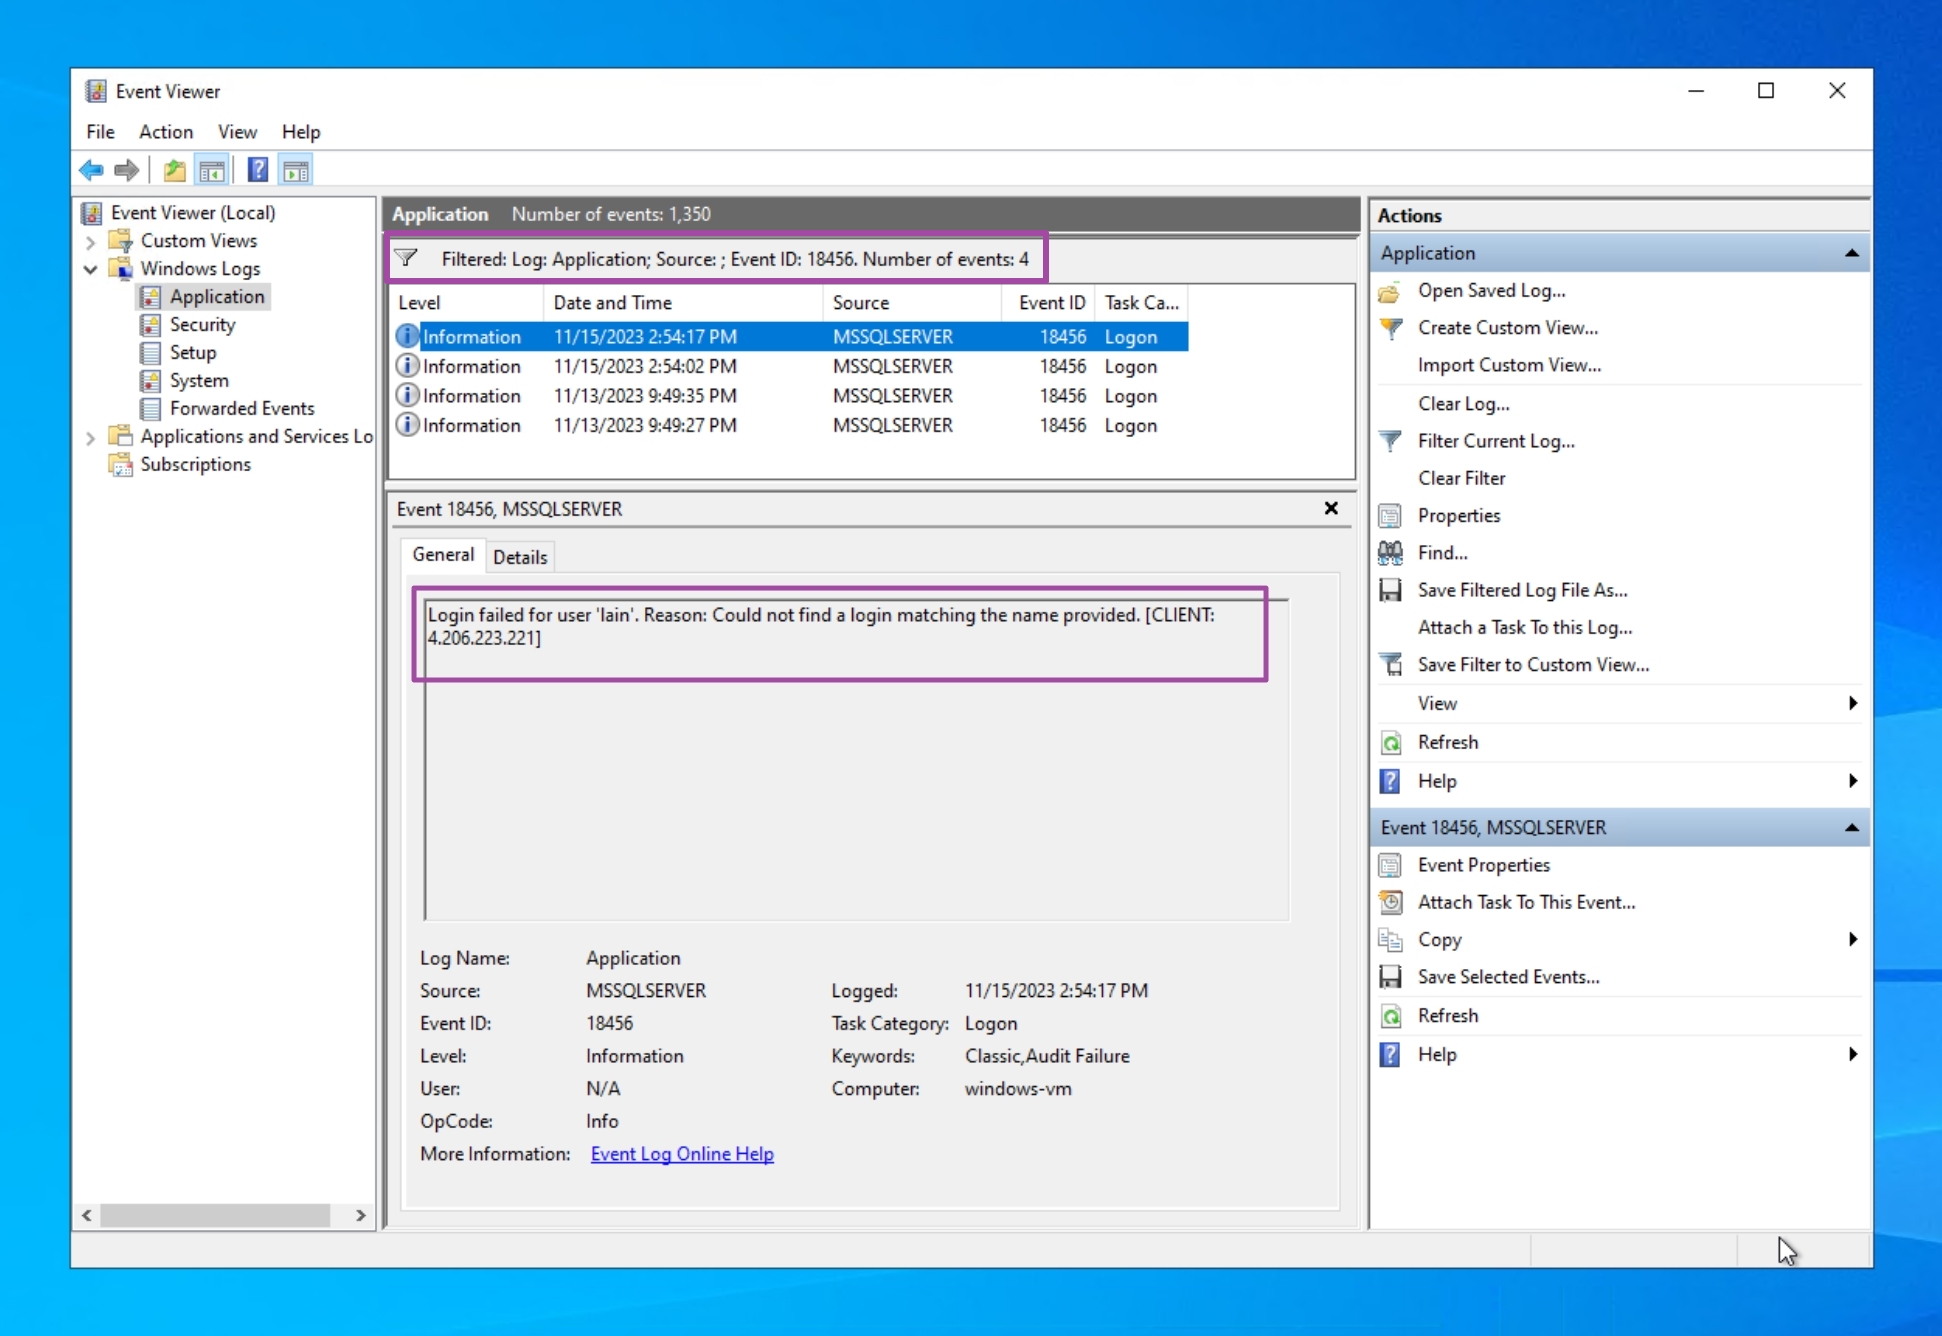
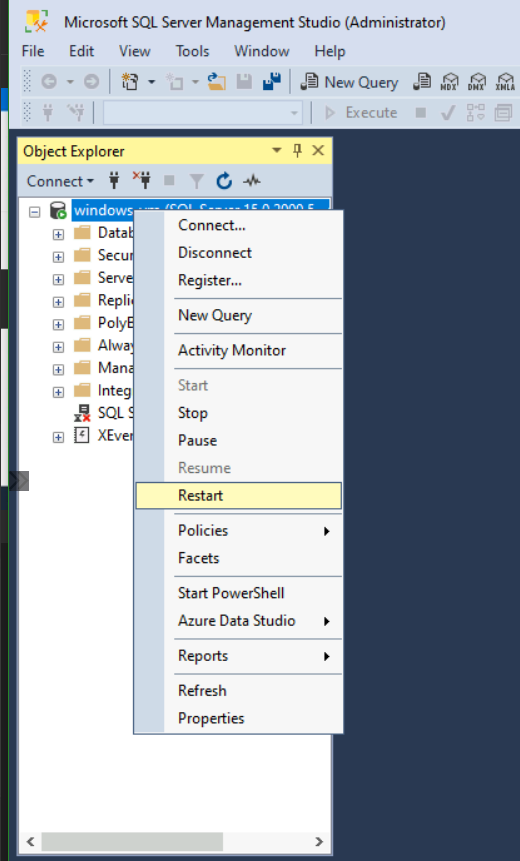
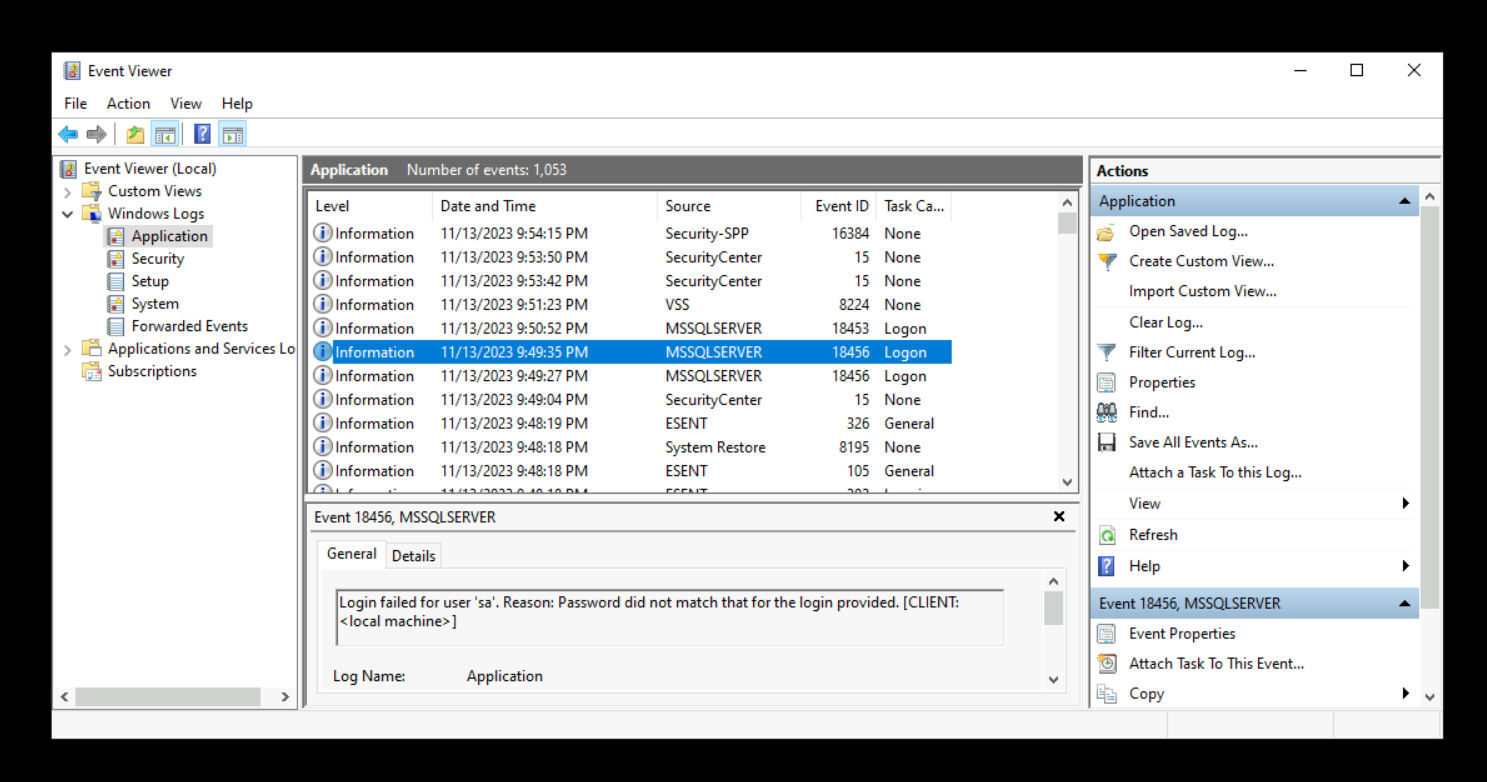
Restart the SQL Server and try to generate some failed authentication logs by trying log into the SQL server with the wrong password.
Check Event Viewer to make sure the logs are properly enabled and porting to Event Viewer successfully.
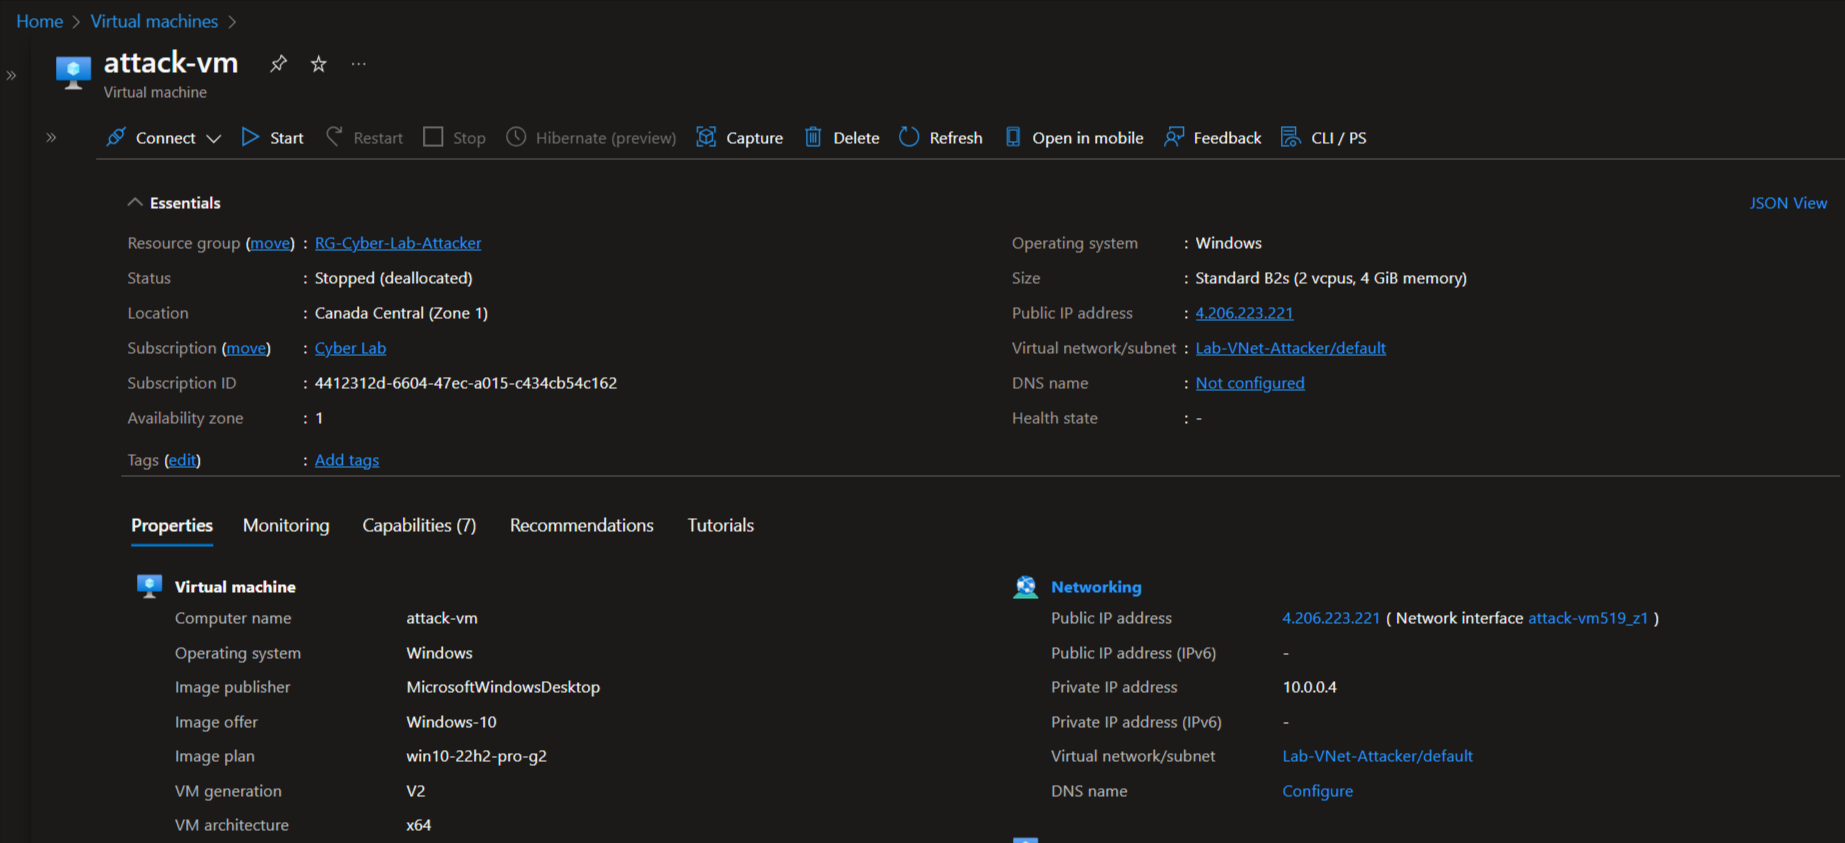
Create Attack (Threat) VM
Create another Windows VM in a different resource group, region, and virtual network. All other settings can be the same or similar.
Generate Logs
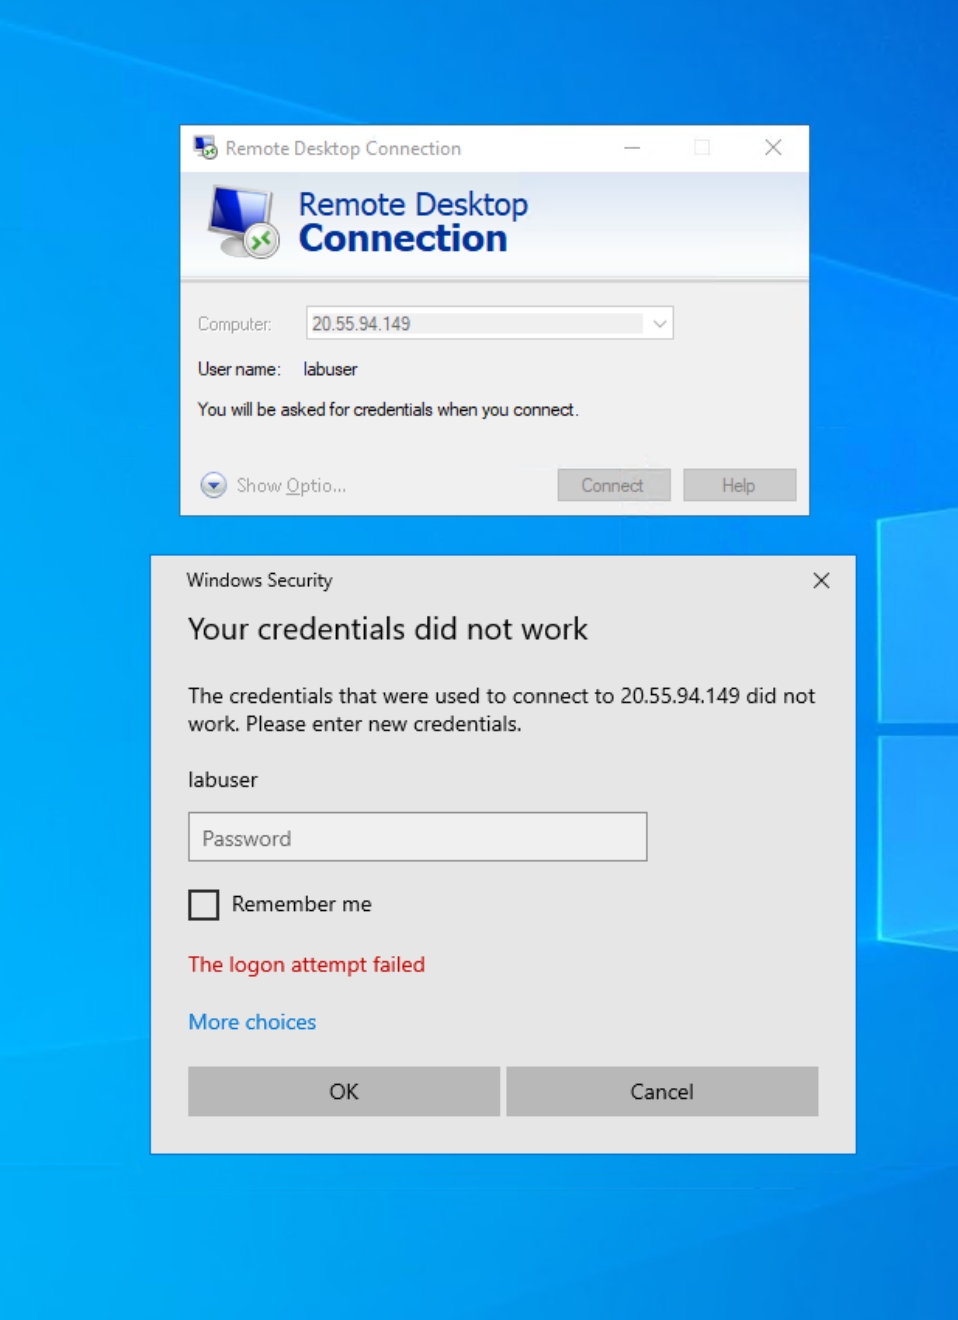
To make sure everything is working as expected, log into the attack-vm to generate failed authentication logs on both vms.
Generating failed RDP logs on windows-vm:
Using PowerShell to generate failed login logs on linux-vm:
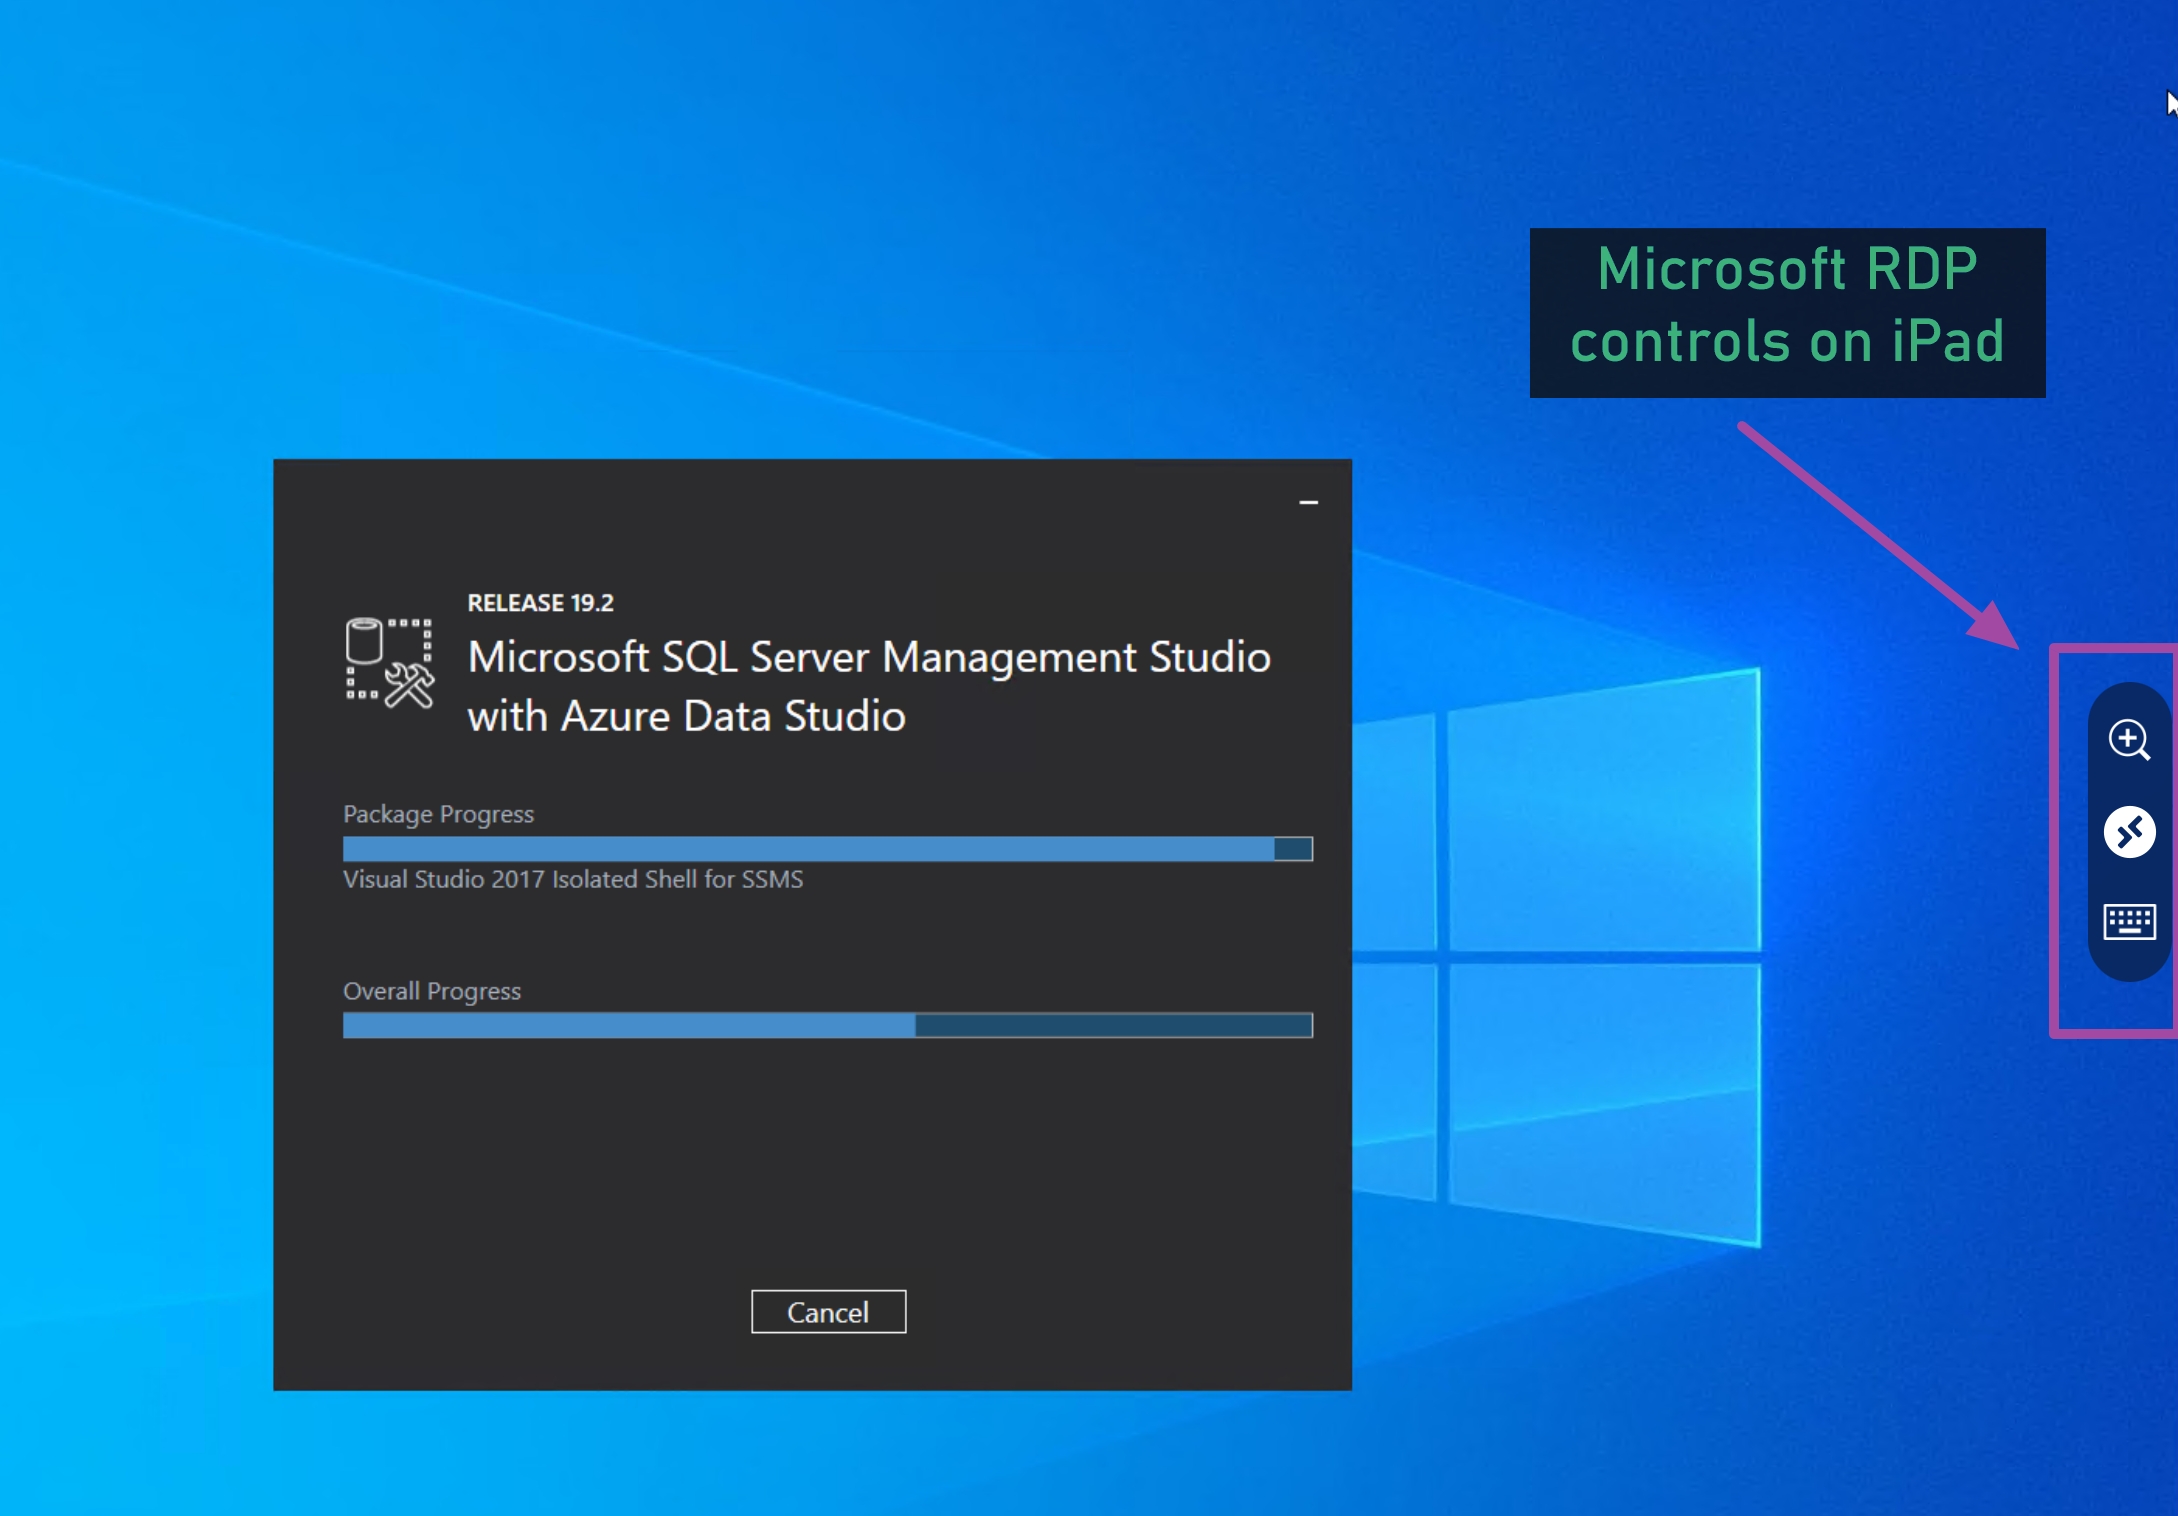
Installing SMSS on attack-vm:
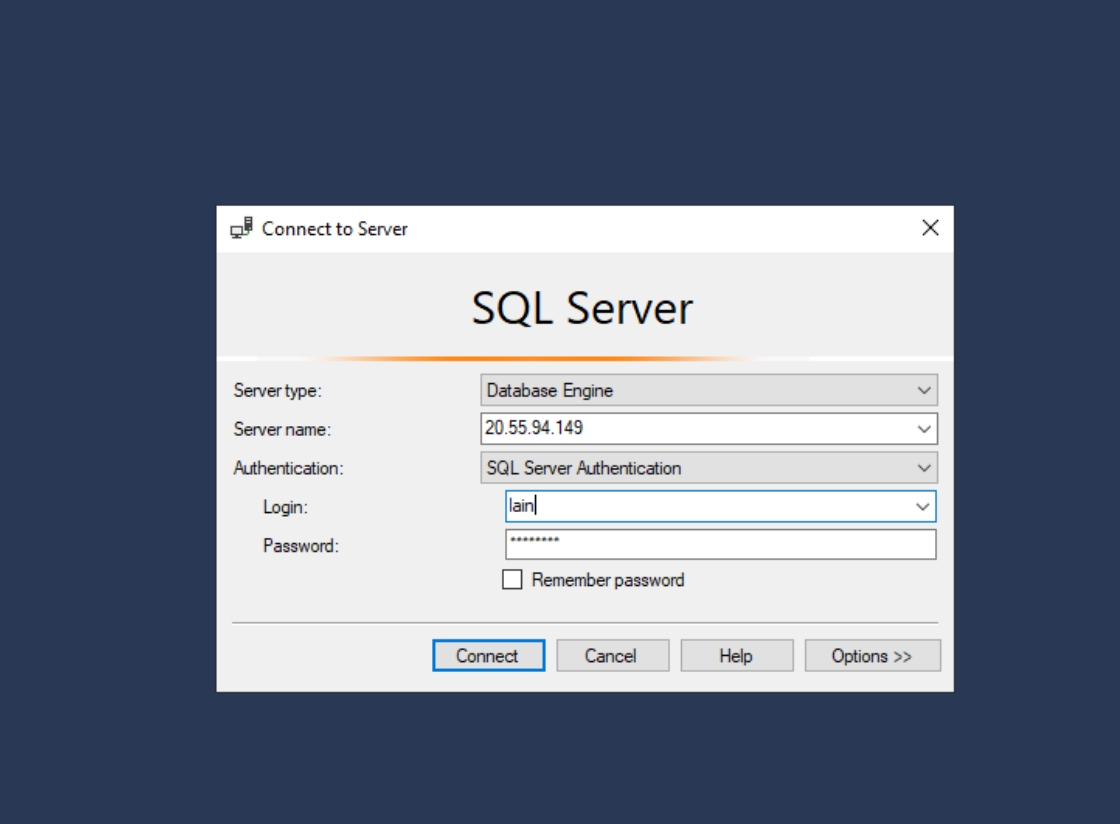
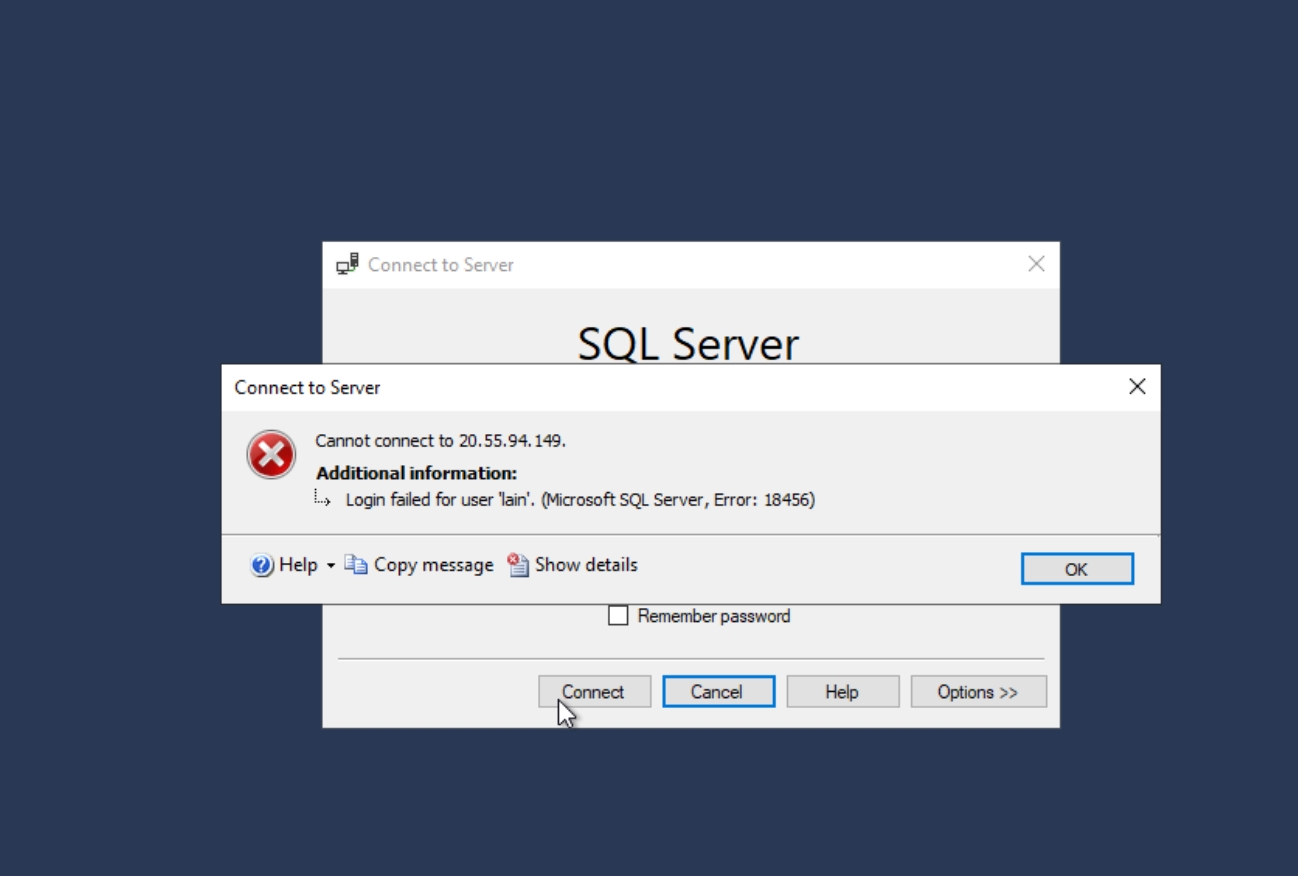
Generating failed login logs for MS SQL Server on windows-vm:
Check Logs
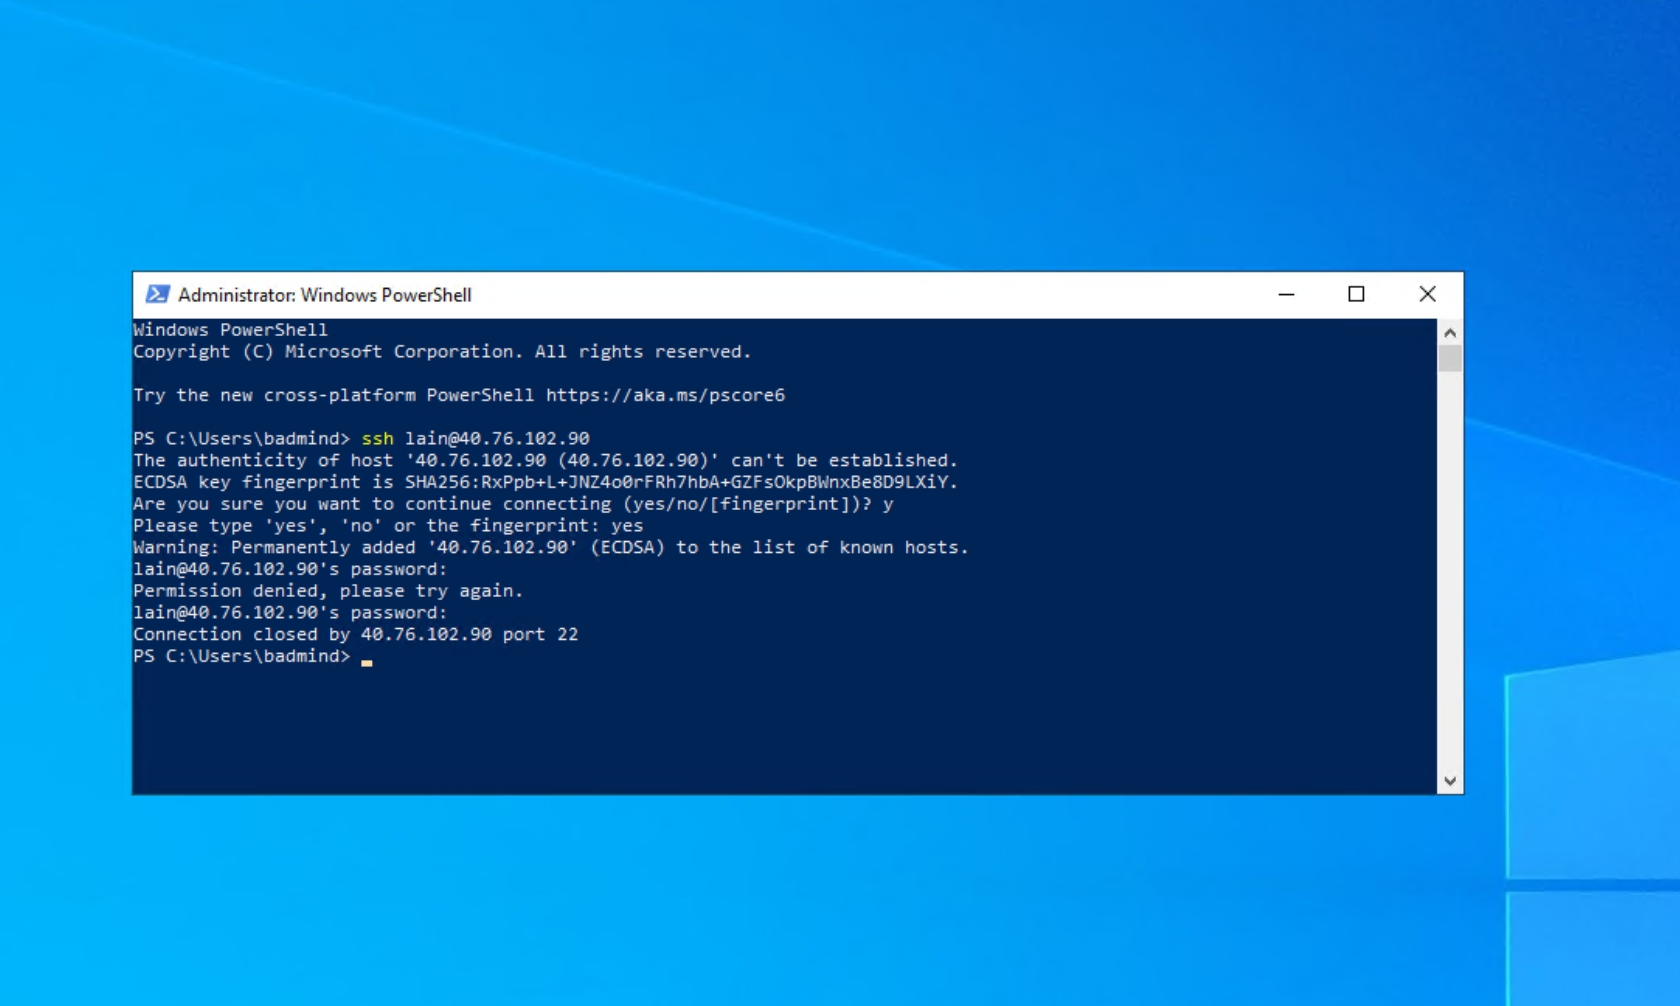
Using PowerShell to SSH into linux-vm:
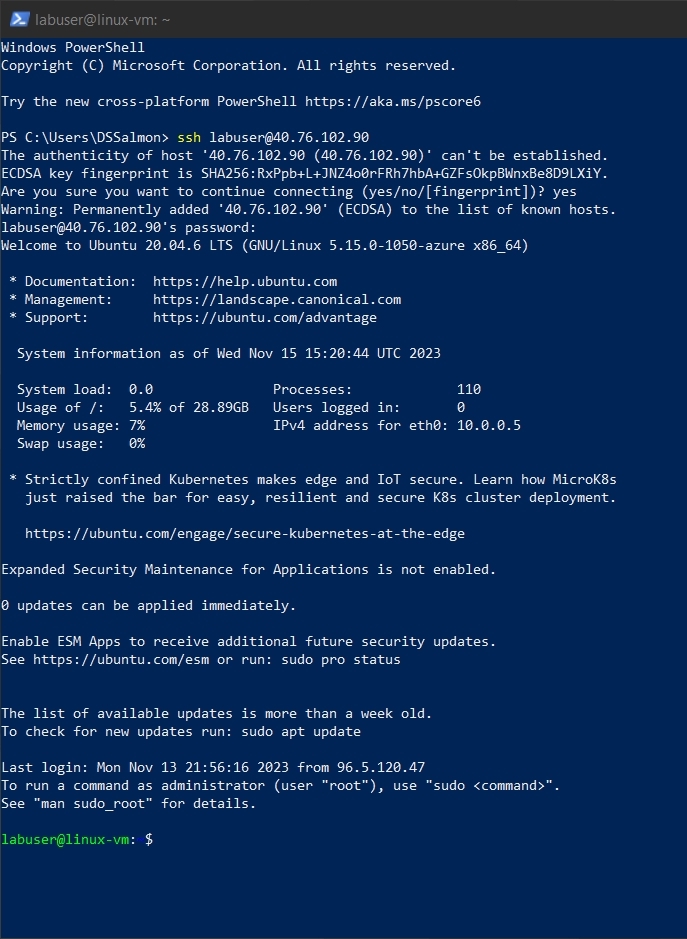
Investigating the logs at /var/log/auth.log for failed authentication

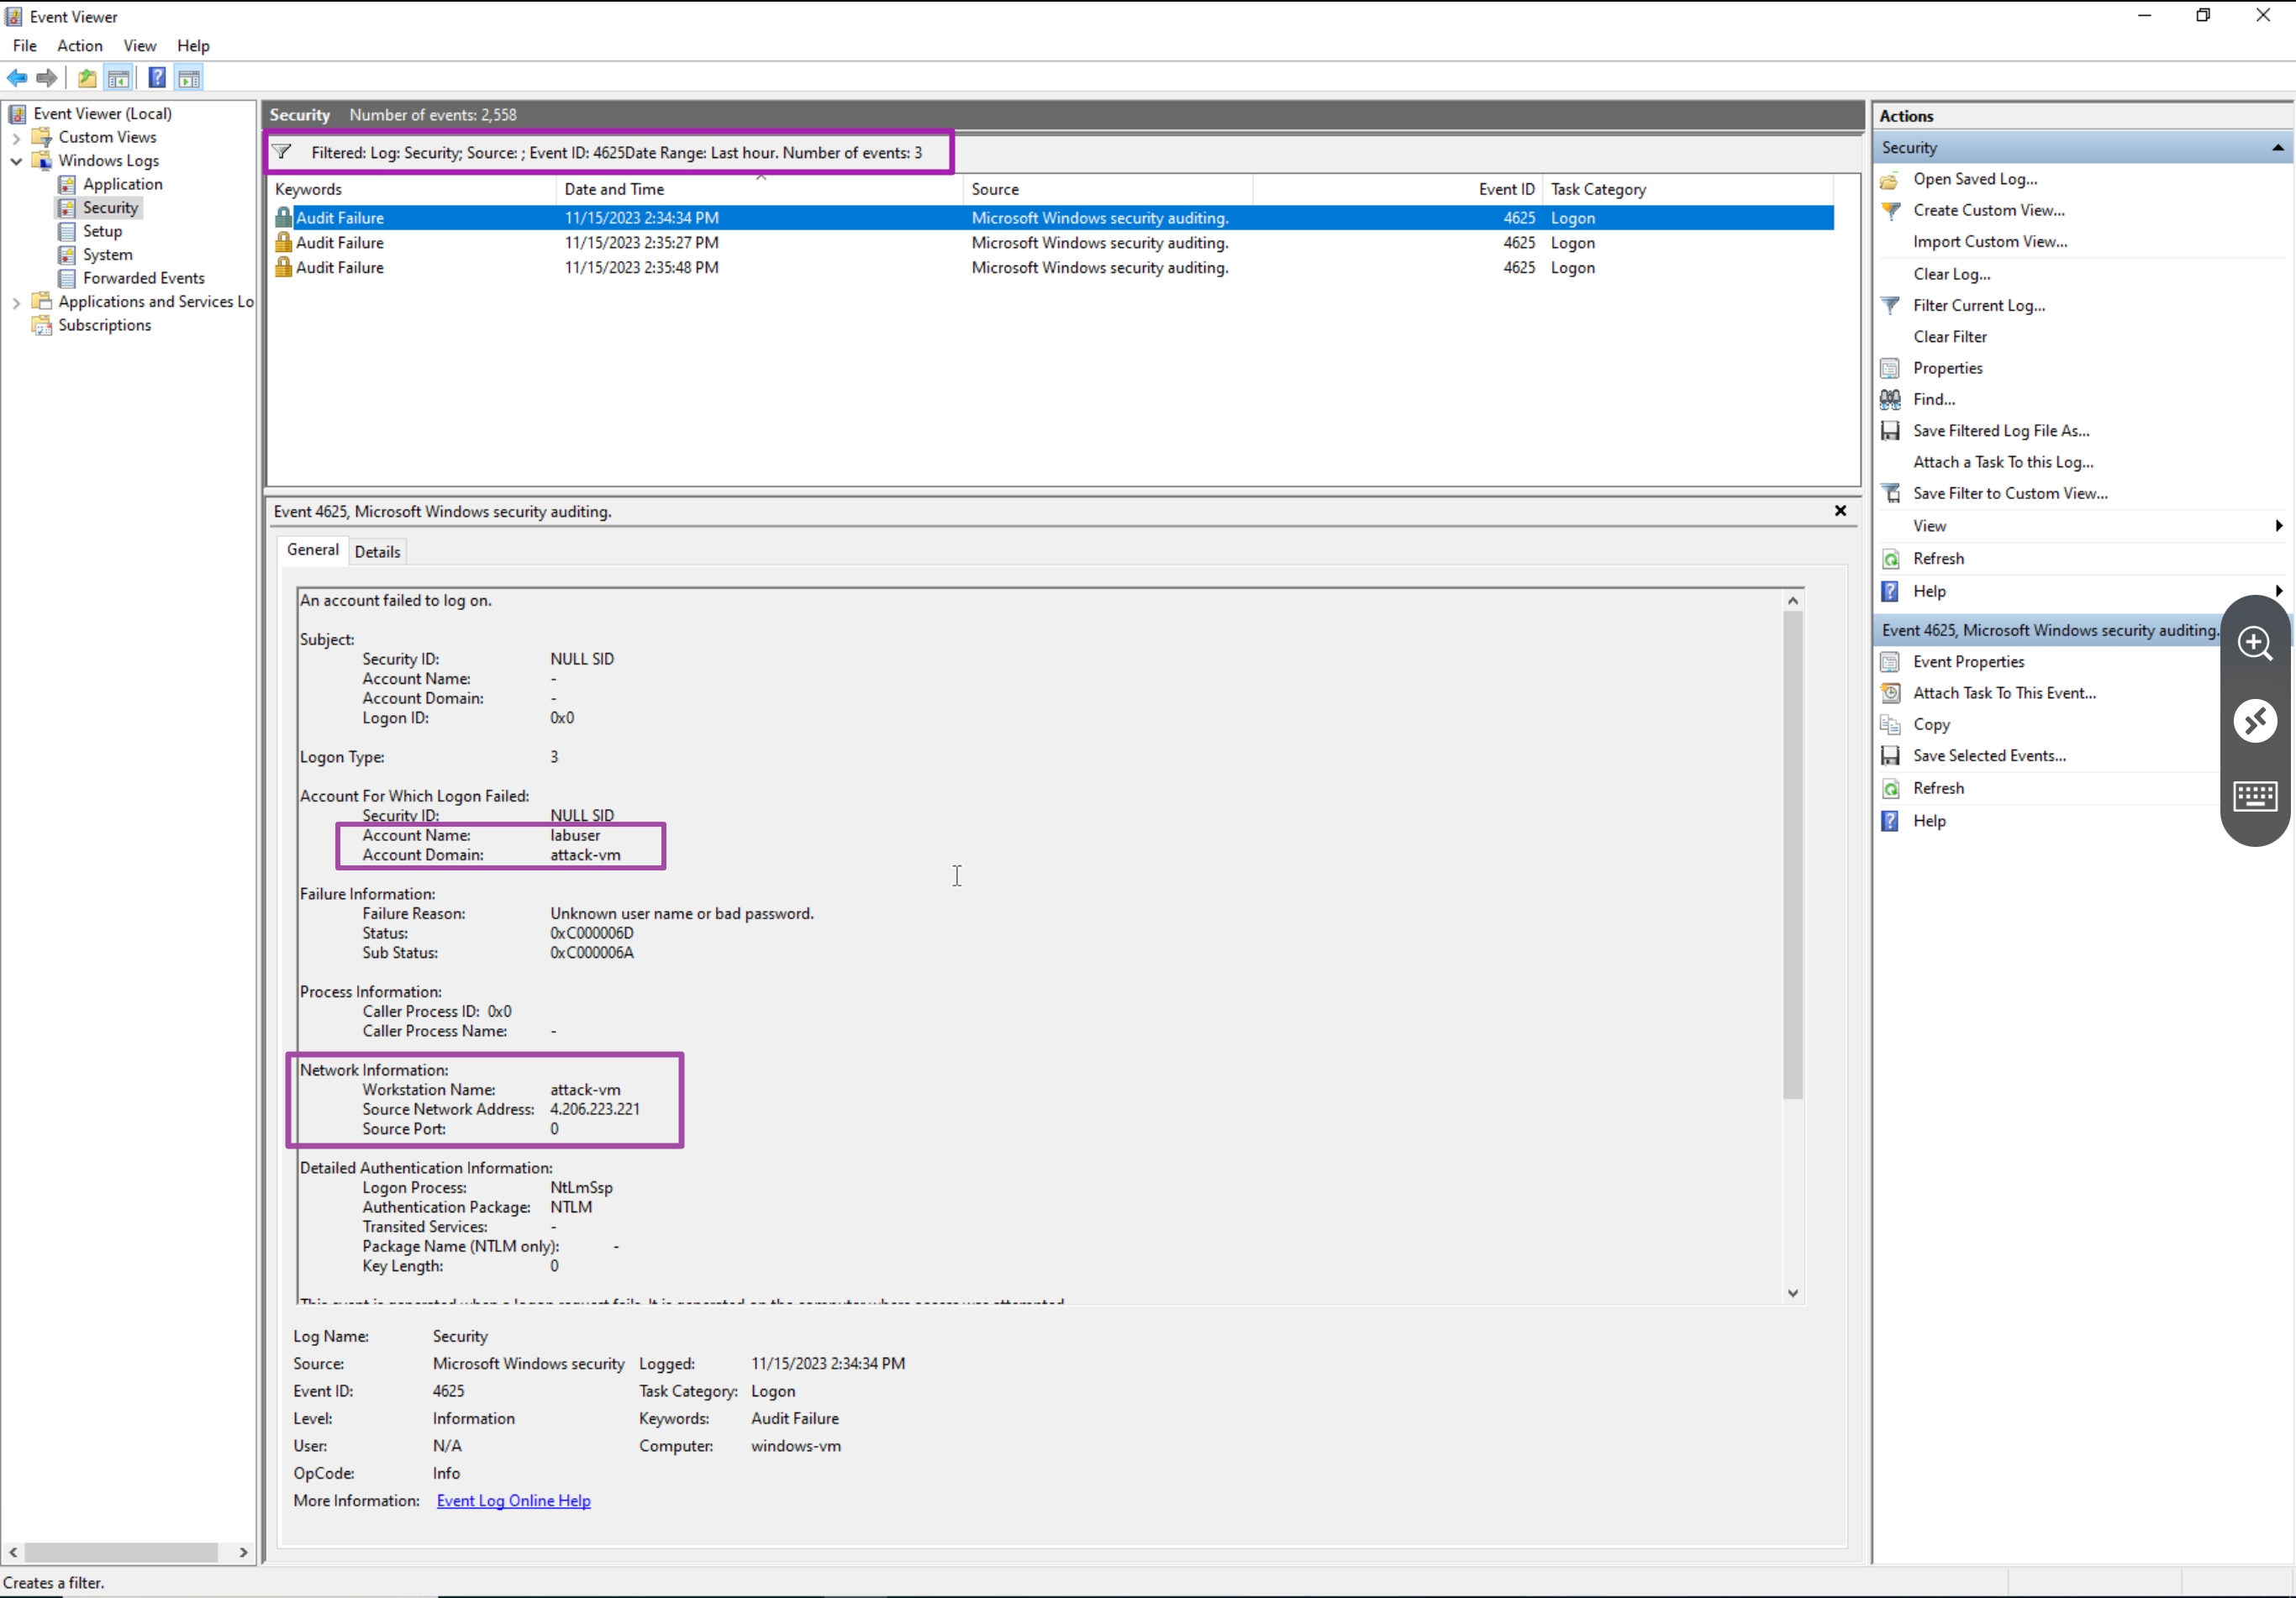
Checking Event Viewer on windows-vm:
In Windows Event Viewer, there are normally a lot of logs, in the screenshots below the logs are filtered by the specific events we're looking for.
Windows Logs > Security, filtered by Event ID: 4625
Windows Logs > Application, filtered by Event ID: 18456